This is an idea I've had brewing in my head for well over a year now. It all started when my sister put in this gorgeous wallpaper in her daughter's nursery. THEN I started crushing on this Hygge & West wallpaper and just KNEW I had to put it in the girls' room (I'm actually really excited about the wallpaper resurgence- so many modern and colorful designs!).
However, after doing all the calculations, I decided that it simply wasn’t in the budget. And, after seeing the oversized florals in Hayden's nursery I thought that might be a little more do-able. I also figured I could paint over it if I hated it!
So, I decided to give the floral thing a shot. This method I used is really so forgiving- I will describe it in detail as best I can! And it was actually a quick project – the planning took a lot longer than the actual painting.
The first thing I did was sketch the composition on my iPad so I knew so I could get my ideas out "on paper", and play with color palettes. I pulled the composition off of a few bouquet photos I liked and traced certain parts of it to get me started. After that it was a matter of filling in the gaps, and repeating some of those same florals in different spots. I knew wanted to keep in the color scheme I have been prepping for their room anyway- pink, orange, mustard yellow, and black and white. I wanted the flowers to have more of an illustrative feel as opposed to a realistic look, which I knew would be a lot easier for me to achieve. I like to call these my "scribble flowers".
Thanks to my iPad and Procreate, it's actually really easy to share that process with you here:
The room also has a chair rail on all the walls (when we moved in there was a really uh, interesting frog border sandwiched in-between the molding)- and I wanted to make sure that everything would look right with the chair rail– so I knew I needed to do something to add interest there to keep the flow throughout the room. So, I also drew up a mock up of how it would look in the room.

My room mock up with the floral design and border.

This woman actually swore she would never paint a room pink...famous last words!
Once I had come up with a design I was happy with, it was time to paint!
My mom came over and helped me paint the three different colors on the walls – and this is definitely the hardest part! We ended up having to paint the ceiling after we realized it wasn’t actually white, but a very light blue which wouldn’t complement the new colors. I'm so thankful I had my mom to help me pick out the grey color (really more of a greige than grey) on the bottom- previously it was a really blue grey which made it feel cold and sterile to me. Since I knew we'd be adding warmer colors, it was really important to pick a grey with a warm undertone- otherwise it would have made the original grey look very blue.
Pink background color: Valspar Arctic Ice
White: Valspar Downy
Grey on bottom and in mural: Valspar Requisite Grey
We used Satin sheen with every paint- I have found it is very scrubbable without being too shiny.
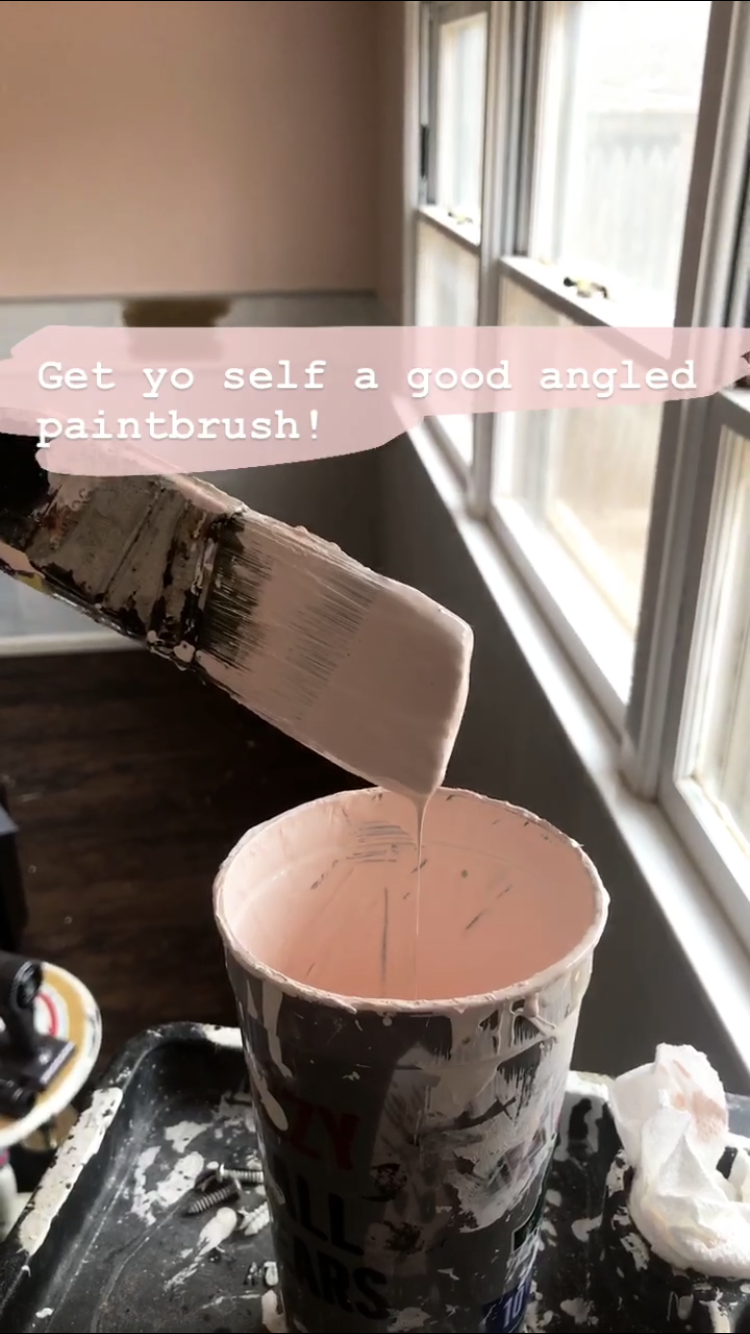
If you watch my Insta stories (follow me @lissaanglin), you’ll remember that I recommended using an angled brush as opposed to a square one. I hate messing with painter's tape and have found that an angled brush gives me as good or better results. The key with the angled brushes to not overloaded with too much paint and go slow.
Once my base coats were ready, it was time to sketch out the composition. I’d like to do my outlines with chalk, since it wipes off easily. At first I tried drawing with white chalk, but it just wasn’t enough of a contrast on the pink, so I ended up using a light purple chalk. It did end up mixing with the paint somewhat, but it just wasn’t that big of a deal for me – so be warned if you choose to use a darker color of chalk – you might see it a bit!
Next I mixed all of my additional colors for the mural. To keep everything really consistent, I chose to use the same white paint that was on our trim and chair rail, so that all of the paint would have the same base color. Not all white paints are created equal – some have a blue base, some have a green base, some red, some yellow – you get the idea. I mixed the paint in my fancy Solo cups- adding about half a cup of white paint and then tinting the white with these paints from Michaels by adding just a bit at of color at a time and stirring well.

I am a messy painter!
Keep in mind that your paint will dry darker than it looks when wet. It might be a good idea to paint yourself a test on a piece of paper and let it dry so that you can see the actual colors. I would also suggest using a more limited color palette – three or four colors max – it will keep it much more consistent and professional looking.
Once I had the composition sketched out and paints ready, it was time for the paint bottom layer which I'm calling the "blobs". This is a really fun part of the process. Using a square brush like these, I began to apply my blobs of paint using my outlines guides- but I wasn't too precious about it. ;)
I wanted to make the color bleed outside of the outline in the end, so I purposely made the color blobs a bit larger than they needed to be. For simplicity sake, I decided to make all of the same types of flowers the same color – so peonies were pink, chrysanthemums were orange, etc. I attempted to do a time-lapse video of myself painting, but didn't quite make it to the outlining stage before my iPad died. However, hopefully this video will give a good idea of how I painted my blobs:
Once the blobs were finished, I let the paint dry fully and then it was time for the outline! I recommend using a round brush (these are great) for the outlines. Keep in mind you will likely need a smaller brush than you think, because when you put pressure on the brush, it’s going to get bigger. So, it’s better to lean on the smaller side so that your outlines don’t become too big.

Can't wait till there are two sweet girls playing in this room!
Looking at my original sketch, I began to paint the outlines over my colored paint blobs. I didn’t worry too much about staying inside or outside of the lines – and purposely went outside the lines frequently. I used only 1 round brush for all of the outline, so that it was consistent throughout.
Once I was finished, I added some random colored dots/blobs of all the colors I used around the entire piece.
That’s it! I needed up having quite a bit of extra paint that I had mixed, and I didn’t want to throw it out because I’m a paint hoarder, so I went to the dollar store and bought some cheap plastic containers that worked perfectly for storage. Now if anything ever happens to the flowers (likely in our household), I have handy touch up paint.

After I was done I was hesitant to hang the curtains on top of the flowers, but that had been my intention from the beginning, and I love the way the flowers peek out from behind. Also, this room has a ways to go but let's be real- the toys are usually on the floor anyway. :)
There you have it! If you made it through this far, thanks for reading and I hope you attempt some scribble florals yourself!