

Never have I ever….packed up an entire house…UNTIL NOW! We’ve lived in our current home (soon to be someone else’s current home, haha) for almost 7 years now- and when we moved in, it was just Shawn and I plus a toddler. So, needless to say, we’ve grown in numbers and STUFF.
I took to Instagram about a month ago, desperate for packing tips, and sure enough- the community delivered. So, I’m passing along my best tips here today!
We decided it would be best to pack quite a few things to prime our home for staging, and so we ended up packing in stages. Part 1- declutter and pack items for staging/showings, and Part 2- pack everything to move.
Because our new home is undergoing a kitchen reno 1st thing (lots more on this soon!), we’ve chosen to put almost everything we own in a storage building, and live with my parents for a few months. We are thankful to have this option.
Knowing that we would want to keep storage costs to a minimum, it was imperative that we get as much into boxes as possible, and pack them efficiently. When we opened the storage container we’d rented on moving day, I was skeptical as to whether or not our things would all fit- and thanks to the expert-level packing skills of our movers, Rev 7 Moving, it all fit with room to spare! We had a great experience with Rev 7- if you’re in the Lubbock area, I would highly recommend them!
Now for my tips!
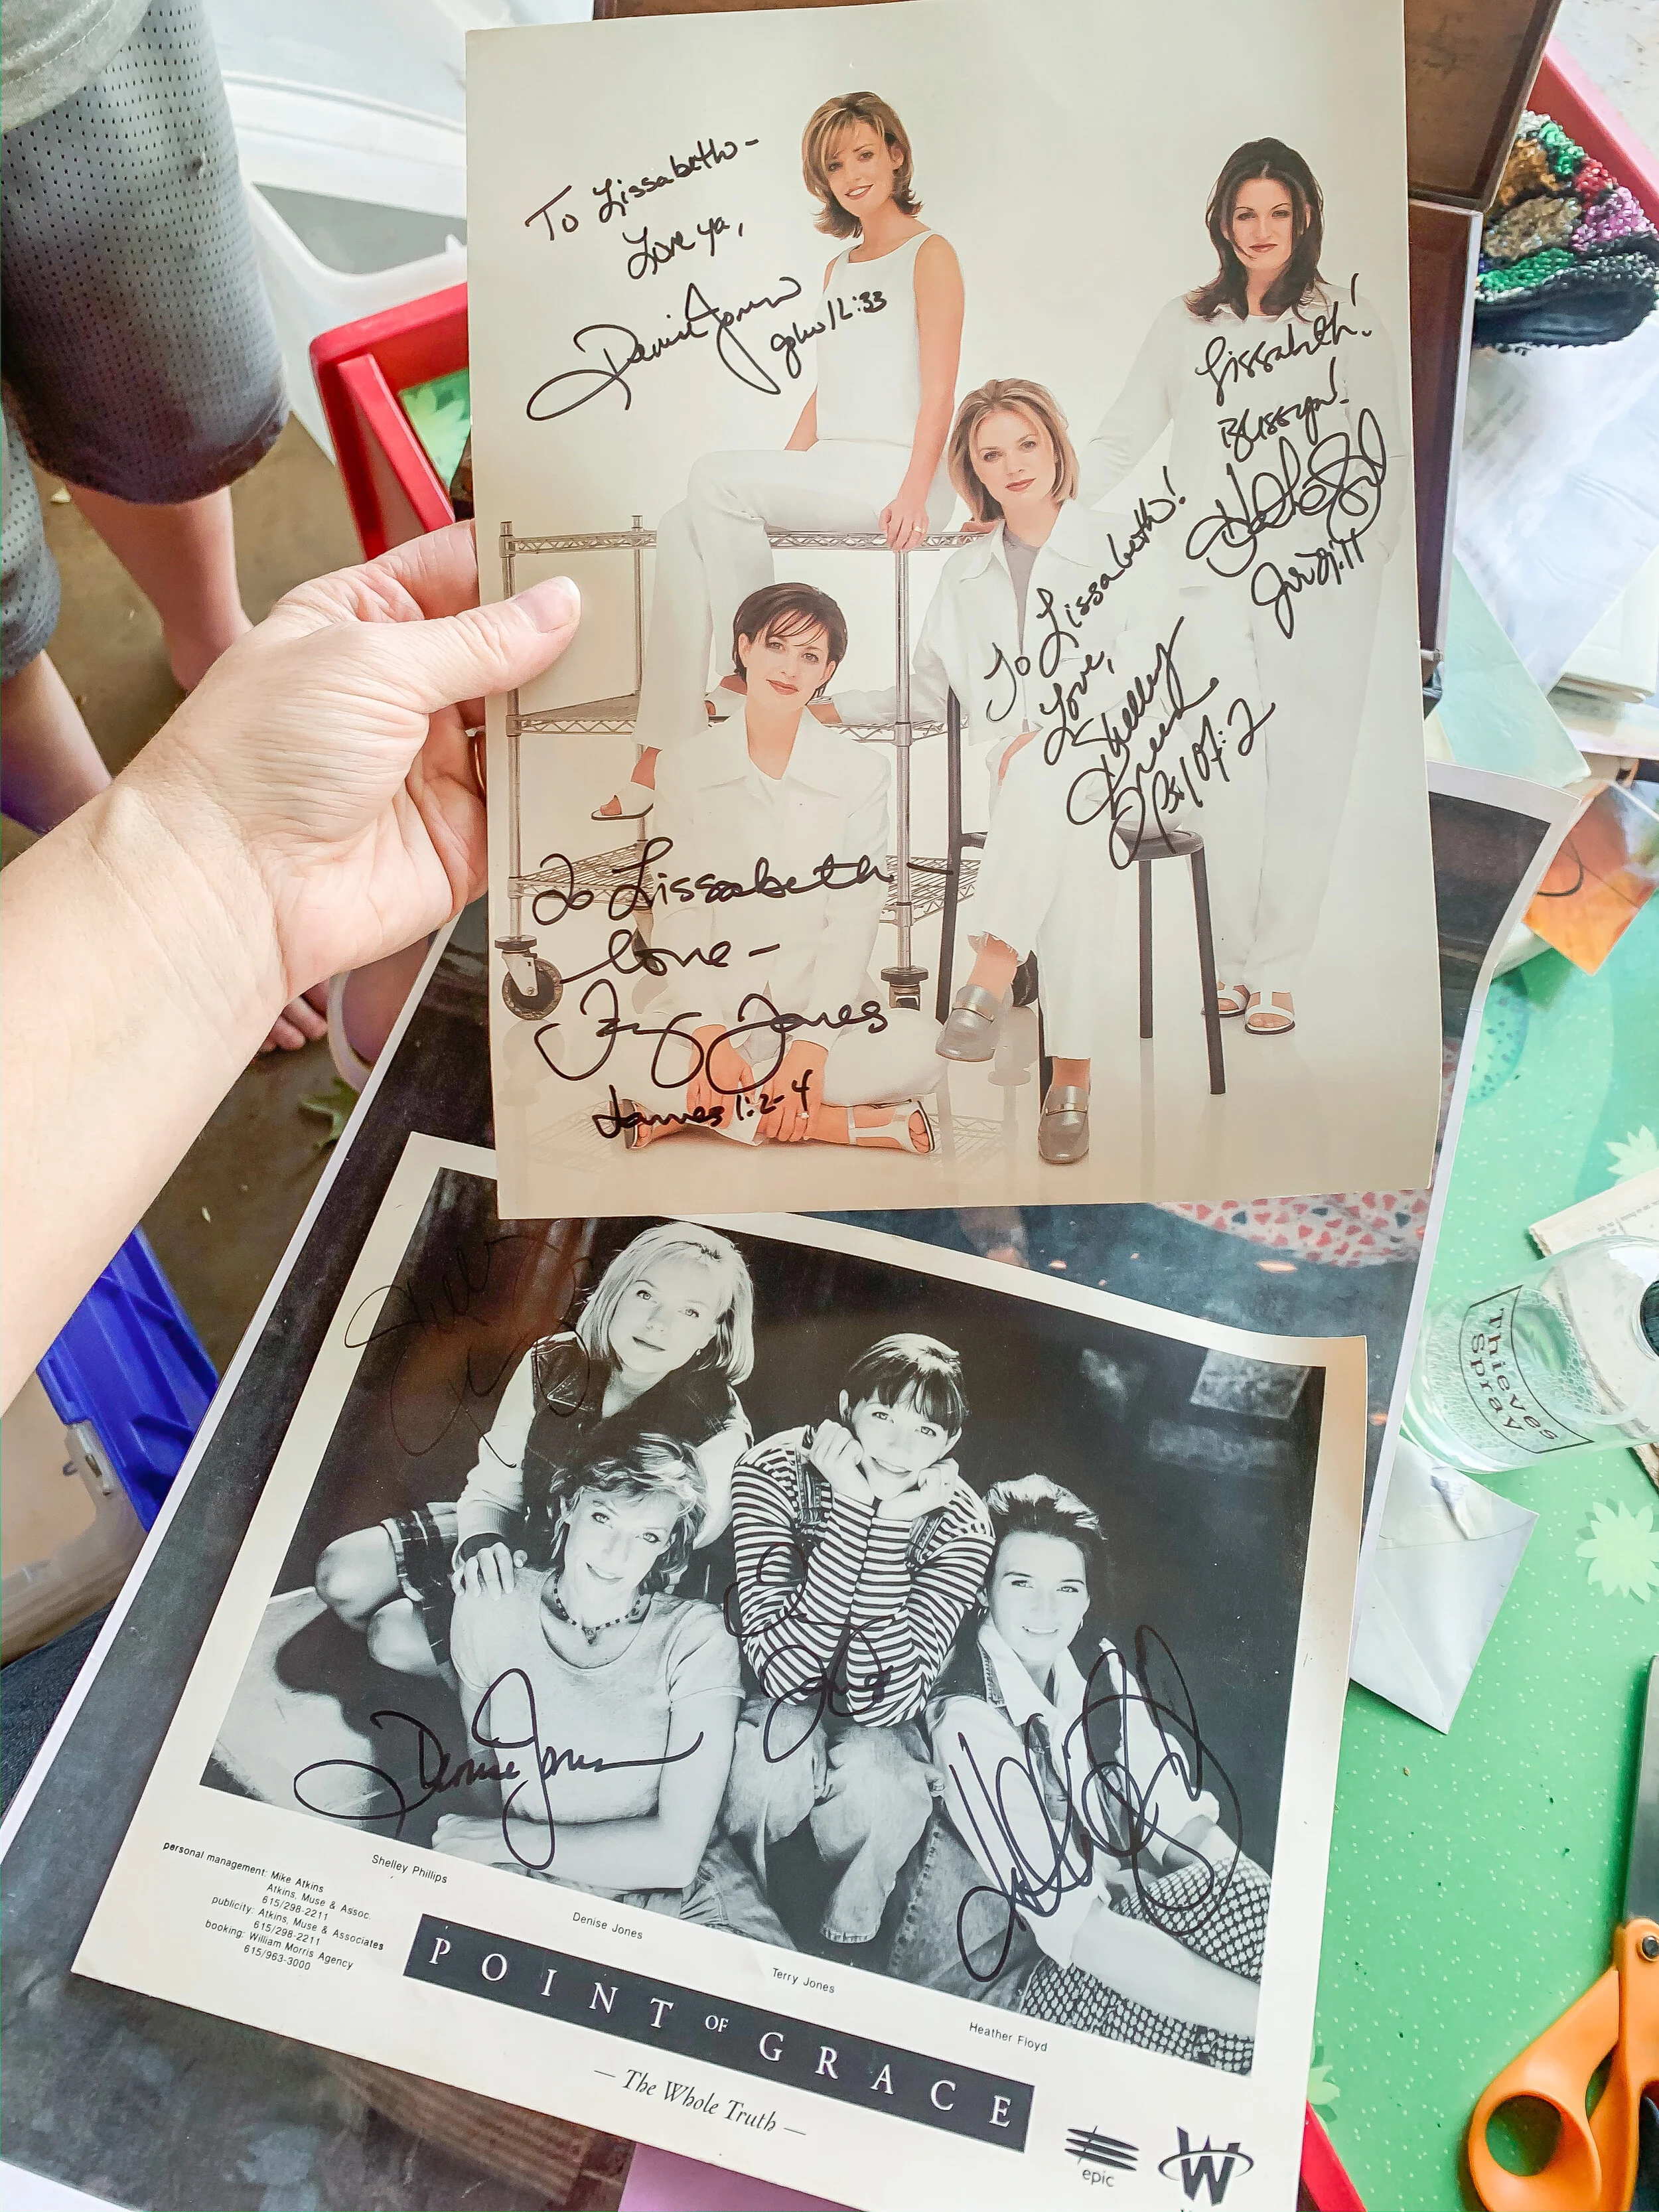
R.I.P. to my signed Point of Grace posters. 😂
DECLUTTER LIKE YOU ARE MARIE KONDO WITH HER PANTS ON FIRE. I know this is an obvious tip, but ya’ll- we legitimately thought we didn’t have enough “stuff” to have a whole garage sale and weeks later- low and behold- our entire garage was full of it. This is a GREAT time to rethink collections, broken things, good intentions and just move on. I ended up selling or trashing so many things that have kept my house cluttered. For a couple of weeks, I chose a closet or drawer to go through- and this really helped in both the packing process and when it was time to clean for the new owners.
KEEP THE SENTIMENTAL CONTAINED. In the process of emptying our attic, I realized I had no less than 7 large Rubbermaid containers full of my mementos from growing up. I am so thankful that my parents saved and stored these items, and honestly I’m really glad I waited until this stage of life to go through it all. Some things were easy to throw away- cards I didn’t even remember receiving (I have such a hard time throwing away notes!), duplicate newspaper clippings, dried out flowers from who knows what occasion. I told myself I wanted to condense both Shawn and I’s sentimental things into one large Rubbermaid container. It took about 2 days, but I did it. The hardest part? The emotional journey I took as I went through my life. Friends I missed, regrets I’ve let sit for years, realizing just how many people have helped and encouraged me. Whew! It was tough, but worth it. My main purpose in going through these things was to make a keepsake box for my kids. As I sorted, I considered the legacy I’m leaving- what I would want my kids to know about my life- what I considered important. And that helped me say yes or no.
HAVE A GARAGE SALE. We initially thought it would be too much hassle to do a garage sale. However, as I started to declutter, I realized that it was totally possible, and so we set a date a couple weeks in advance. This gave me plenty of time to scour the house for what we needed to sell. In the end, I’m really glad we did it- and we had a little extra cash to help cover moving expenses.
COLLECT YOUR BOXES. I am too cheap to actually pay for moving boxes, so we gathered free ones from several places. Grocery stores are always a good source for milk boxes, which are nice for small, heavy things like books. We also were able to get quite a few boxes from friends that worked in warehouses. If you look hard enough, and ask around- you’ll find them!
INVEST IN A HEAVY DUTY PACKING TAPE DISPENSER AND BUY THE GOOD TAPE. My mom and sister lent us a couple of these and they were invaluable. I also learned the importance of getting the good packing tape- 1 or 2 boxes with the cheap stuff and I wanted to throw it through the window! Here’s my favorite tape, and the dispenser I liked the best. Yes, now I have a favorite type of packing tape. Hello, adulthood.
LEARN HOW TO MAKE A CARDBOARD ENVELOPE. I started the packing process working on all my large art pieces and framed photos, as these can be tedious to pack. Instead of buying expensive boxes for these, I made my own with larger boxes and a utility knife. I WISH I had taken a photo of this- but my next tip will tell you how to start.
WRAP ART IN BLANKETS AND STRETCH WRAP. A great solution for art and photographs is to fold them up inside a blanket (you can fit several together with a layer of blanket in between), and then use stretch wrap to hold it all together. This solution was magical for us, and got all our blankets packed at the same time. Then, to finish the cardboard envelope, I cut a broken down larger box in half with a utility knife, and sandwiched the blanket-covererd-art in-between the two pieces of cardboard, always making sure that the cardboard was larger than the blanket/art. Then I taped and stretch wrapped the two pieces of cardboard together tightly so that the art could not move inside the cardboard when it was standing vertically.
Why yes, I did stretch wrap EVERYTHING. Including the inspiration board you see in the background of this photo. All the smaller pieces are pinned into some foamboard I’d mounted on the wall, so I simply took the foamboard down and wrapped it all up!
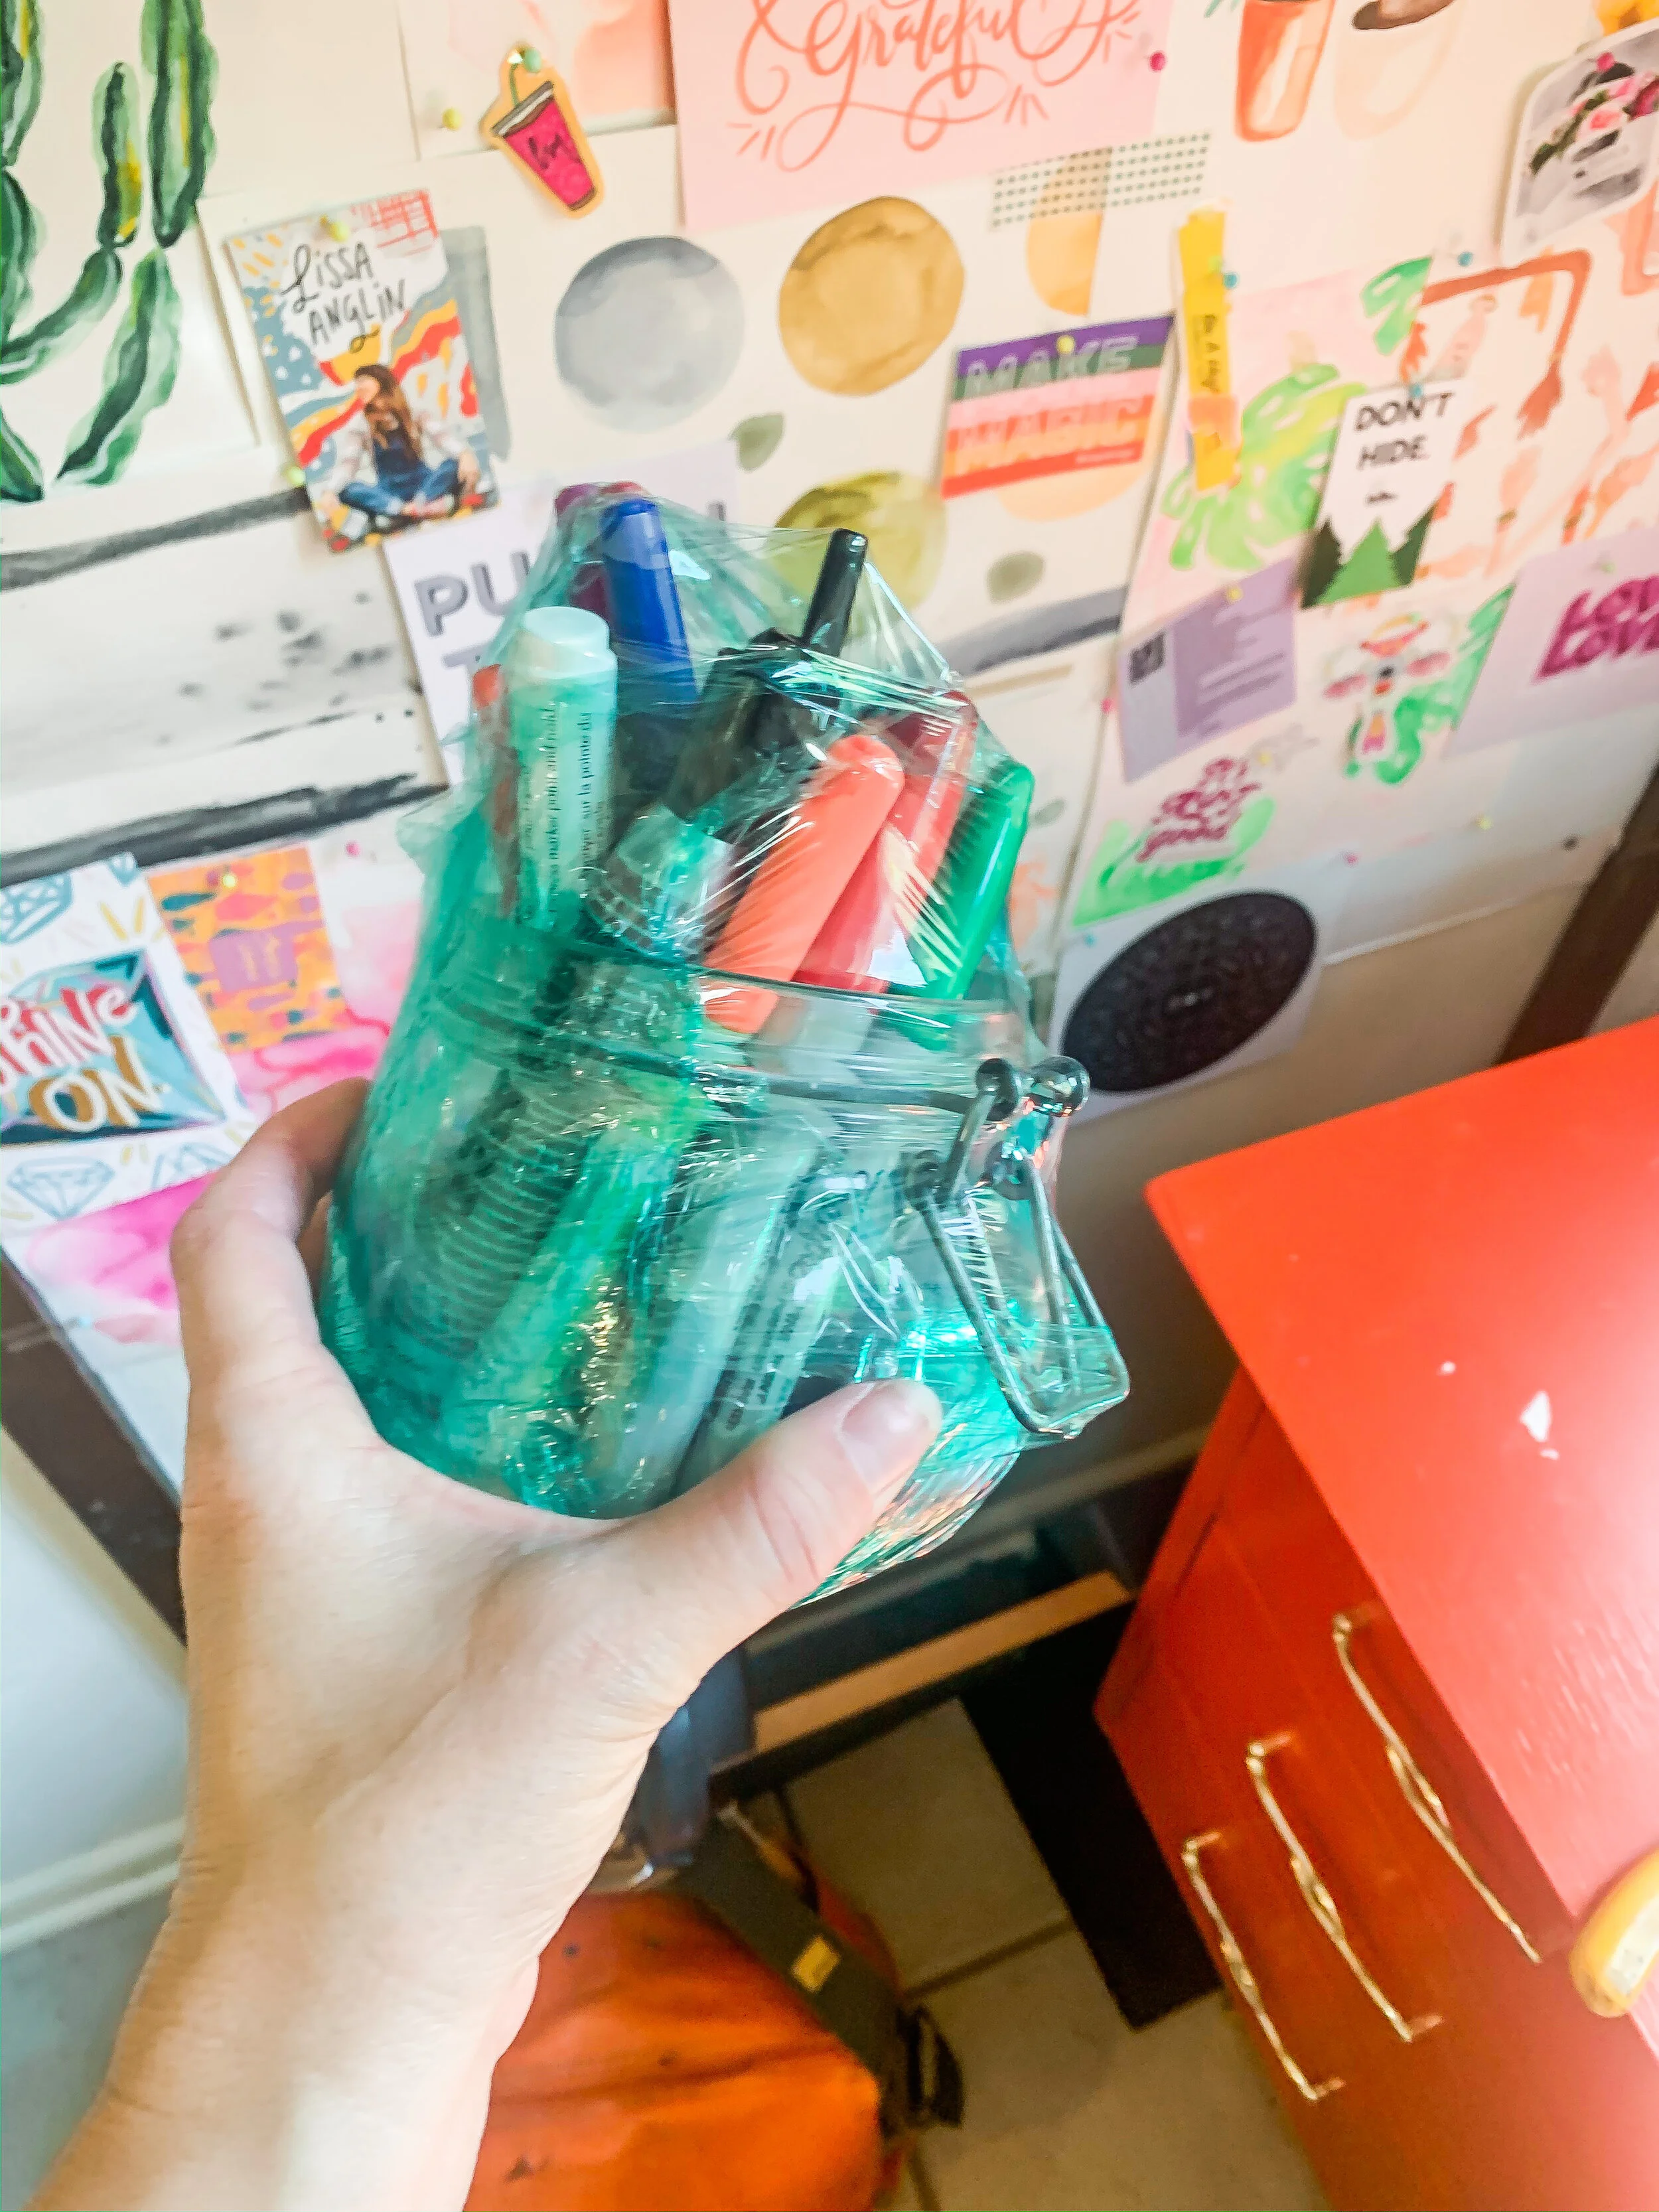
STRETCH WRAP FOR EVERYTHING! Guys, I’m obsessed. I used the roll of stretch wrap my mom brought over so quickly that we had to go buy 2 more! Stretch wrap is so helpful for wrapping anything framed as I mentioned above, but I ended up using it in all sorts of applications. Mason jar with markers in it? Stretch wrap it. Jar full of loose change? Stretch wrap. Hardware that needs to stay with broken down furniture? Stick it in a plastic baggie and stretch wrap it to one of the pieces. I even put stretch wrap over the pot of my fiddle leaf fig so that the dirt wouldn’t fly out in transport- and it worked like a charm! You can find it at just about any local store, but be sure to grab one with a handle like this one.
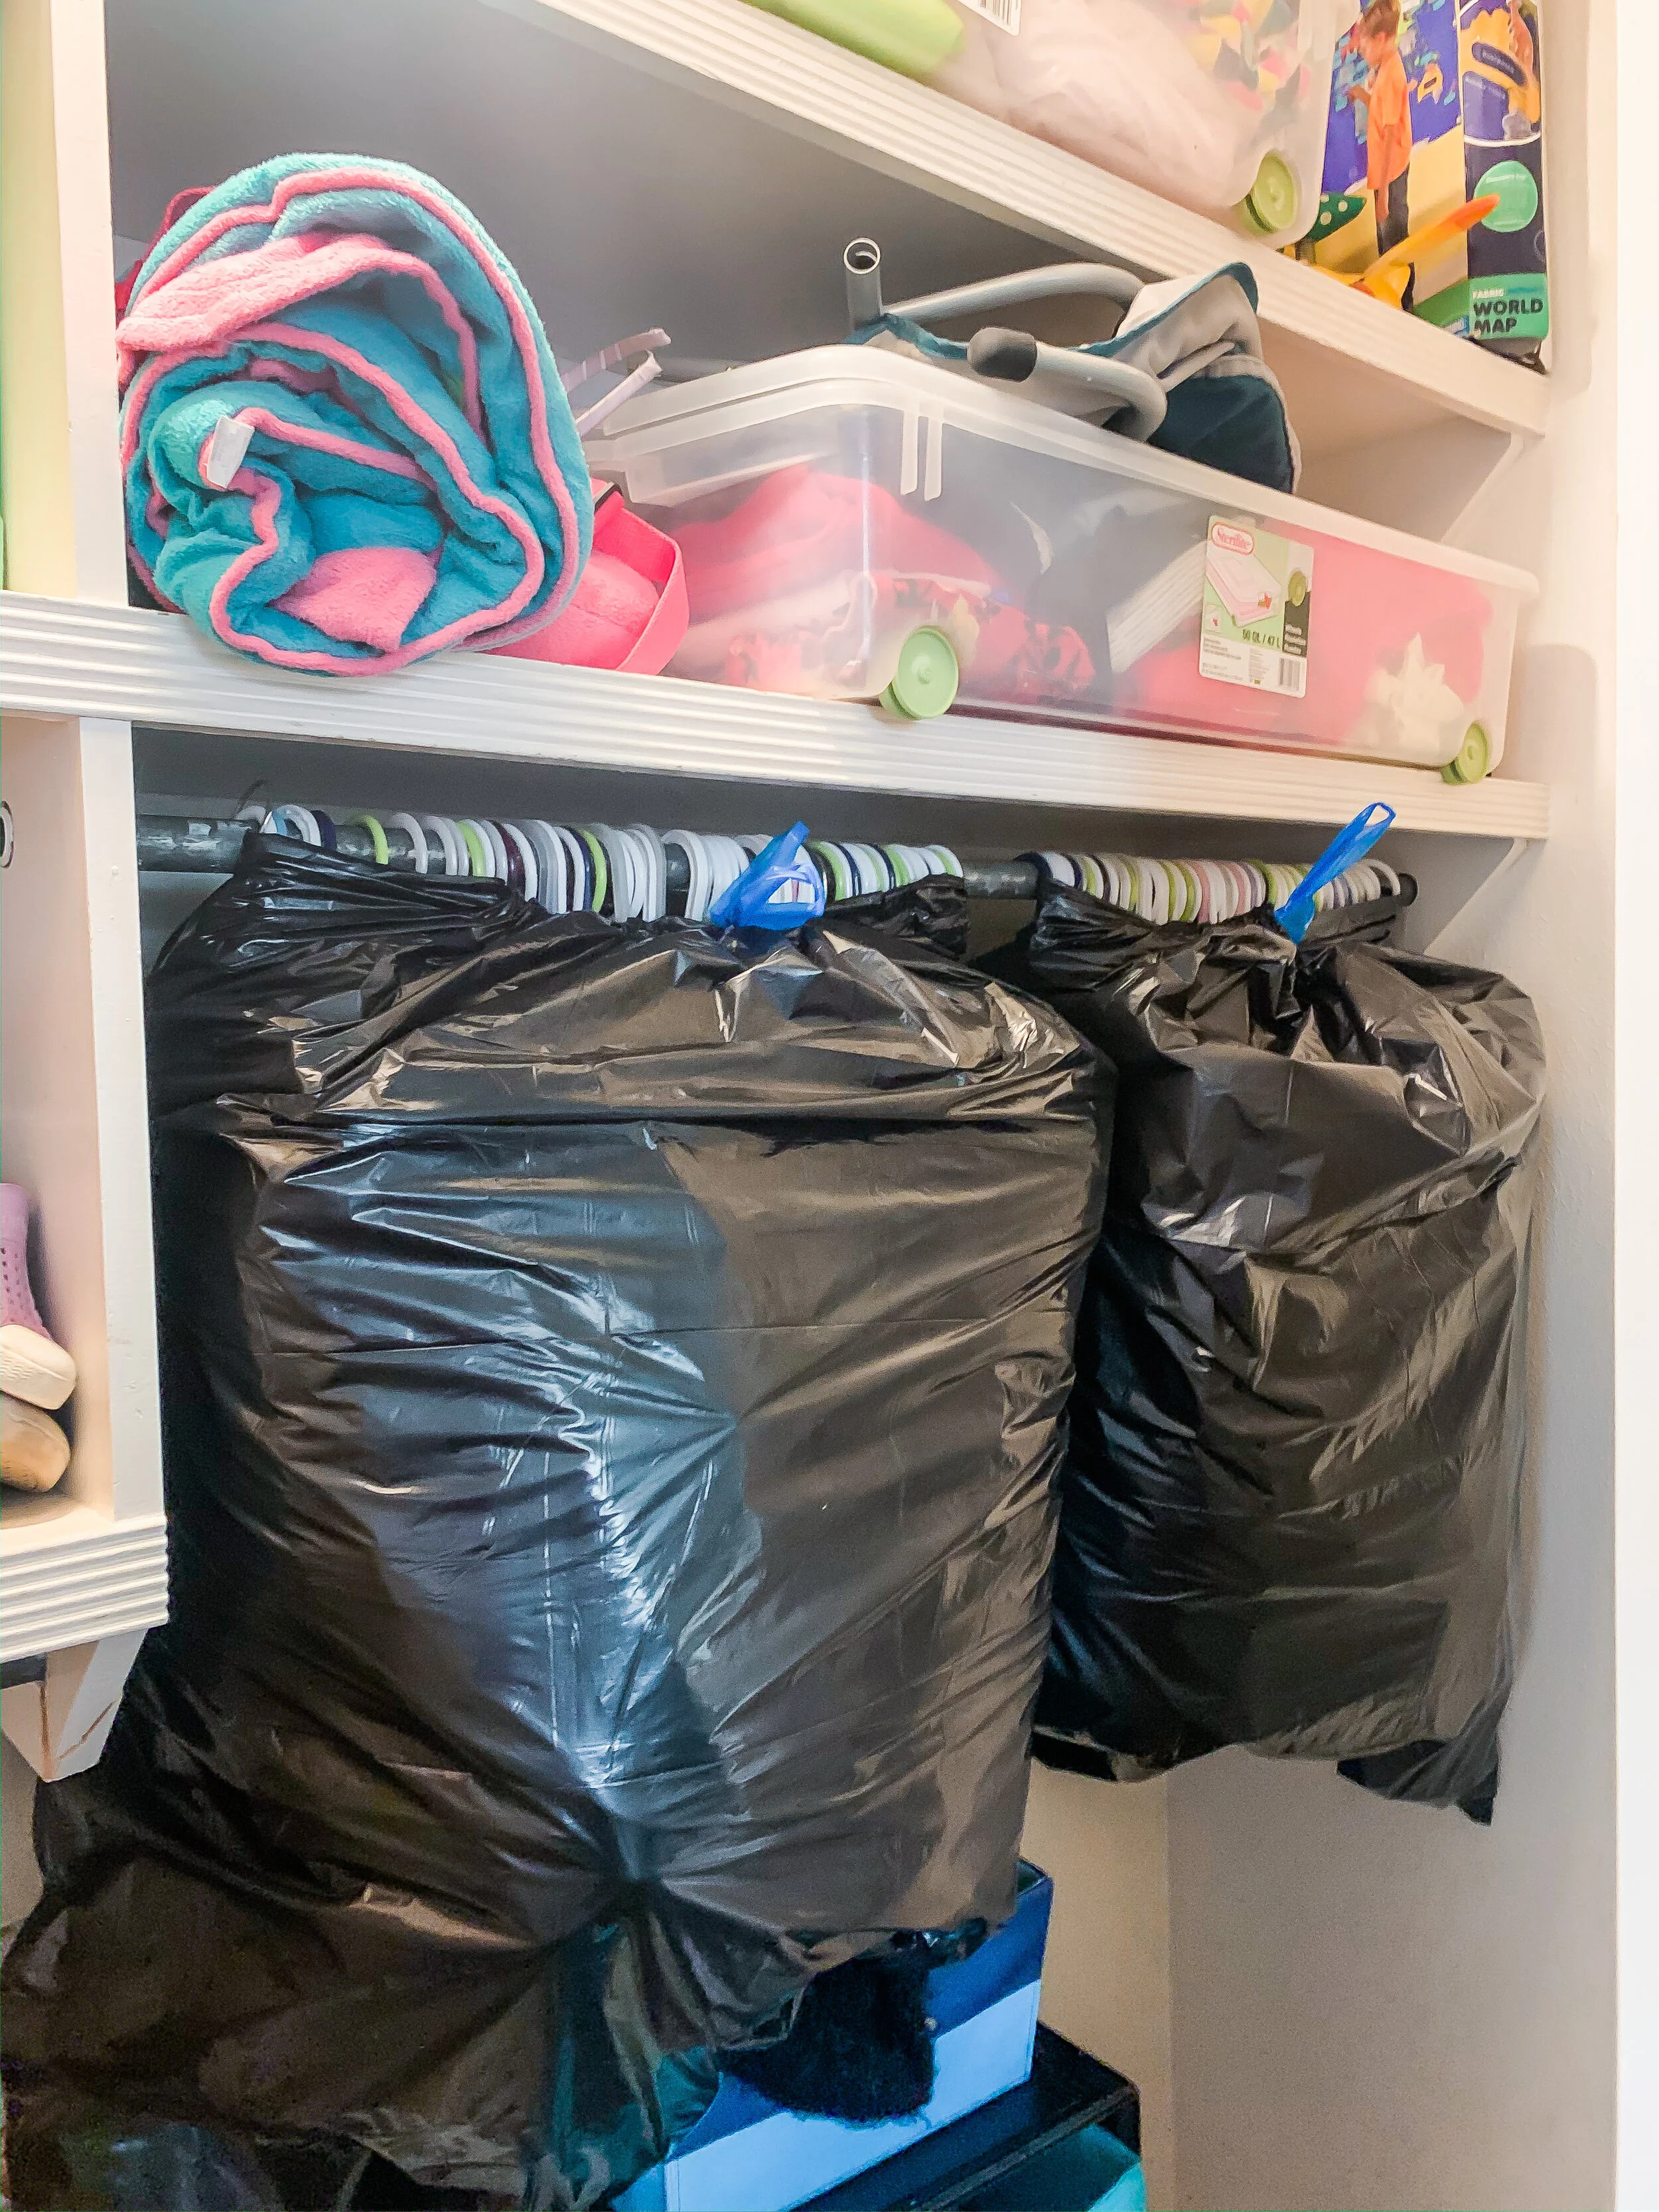
Bagging up our clothing like this was so helpful!
CONTAIN HANGING CLOTHING IN TRASH BAGS. I loved this tip I received on Instagram. We were able to go ahead and move all of our hanging clothes to the new house, but we bagged them up inside large trash bags for moving and storage. So all we had to do to transport was lay them down in the car and hang them directly in the closet. I had considered buying some
USE STYROFOAM PLATES BETWEEN DISHES. This was a great inexpensive solution I ended up really loving for packing my dishes. The plates were the perfect layer of protection for my dishes and allowed me to fit a lot into a box.
So there you go! My top 10 tips! I hope they are helpful to you. I am also planning to post my tips for staging your home to sell- we were able to get over list price and I do think that the staging had a large part in that- so stay tuned for that!