This is a sponsored post written by me on behalf of Cricut. All opinions are 100% mine.

This post is made in partnership with Cricut, a company I love and rave about on the regular! It also contains affiliate links to the products I mention here. These links help me keep creating fun things in this space, so when you click on one, it’s like a virtual high five- thank you!
I am a sucker for a quirky planter, and when my friend Emily shared some adorable planters that donned illustrated faces she got at Target, I rushed to the store to grab some. Upon arriving in the garden section, however, I realized that I was too late. Basically everything was on clearance, and it was slim pickens.
So, what do I do? I’m in Target forgoodnesssake, I wander about the aisles looking for things I didn’t know I needed. :) And I came across this awesome display of plastic dinnerware. They had lots of fun colors- army green, navy, mint, rosy pink, rust red, black, and most of the pieces were .97. And I had an idea.
15 minutes later, Target employees observed me stacking bowls of all shapes and sizes on their shelves. I’d found some white bowls that were a bit more expensive ($2), and was now incorporating them into my black and green collection. I’m sure they were annoyed and also wondering if I knew how a bowl worked.
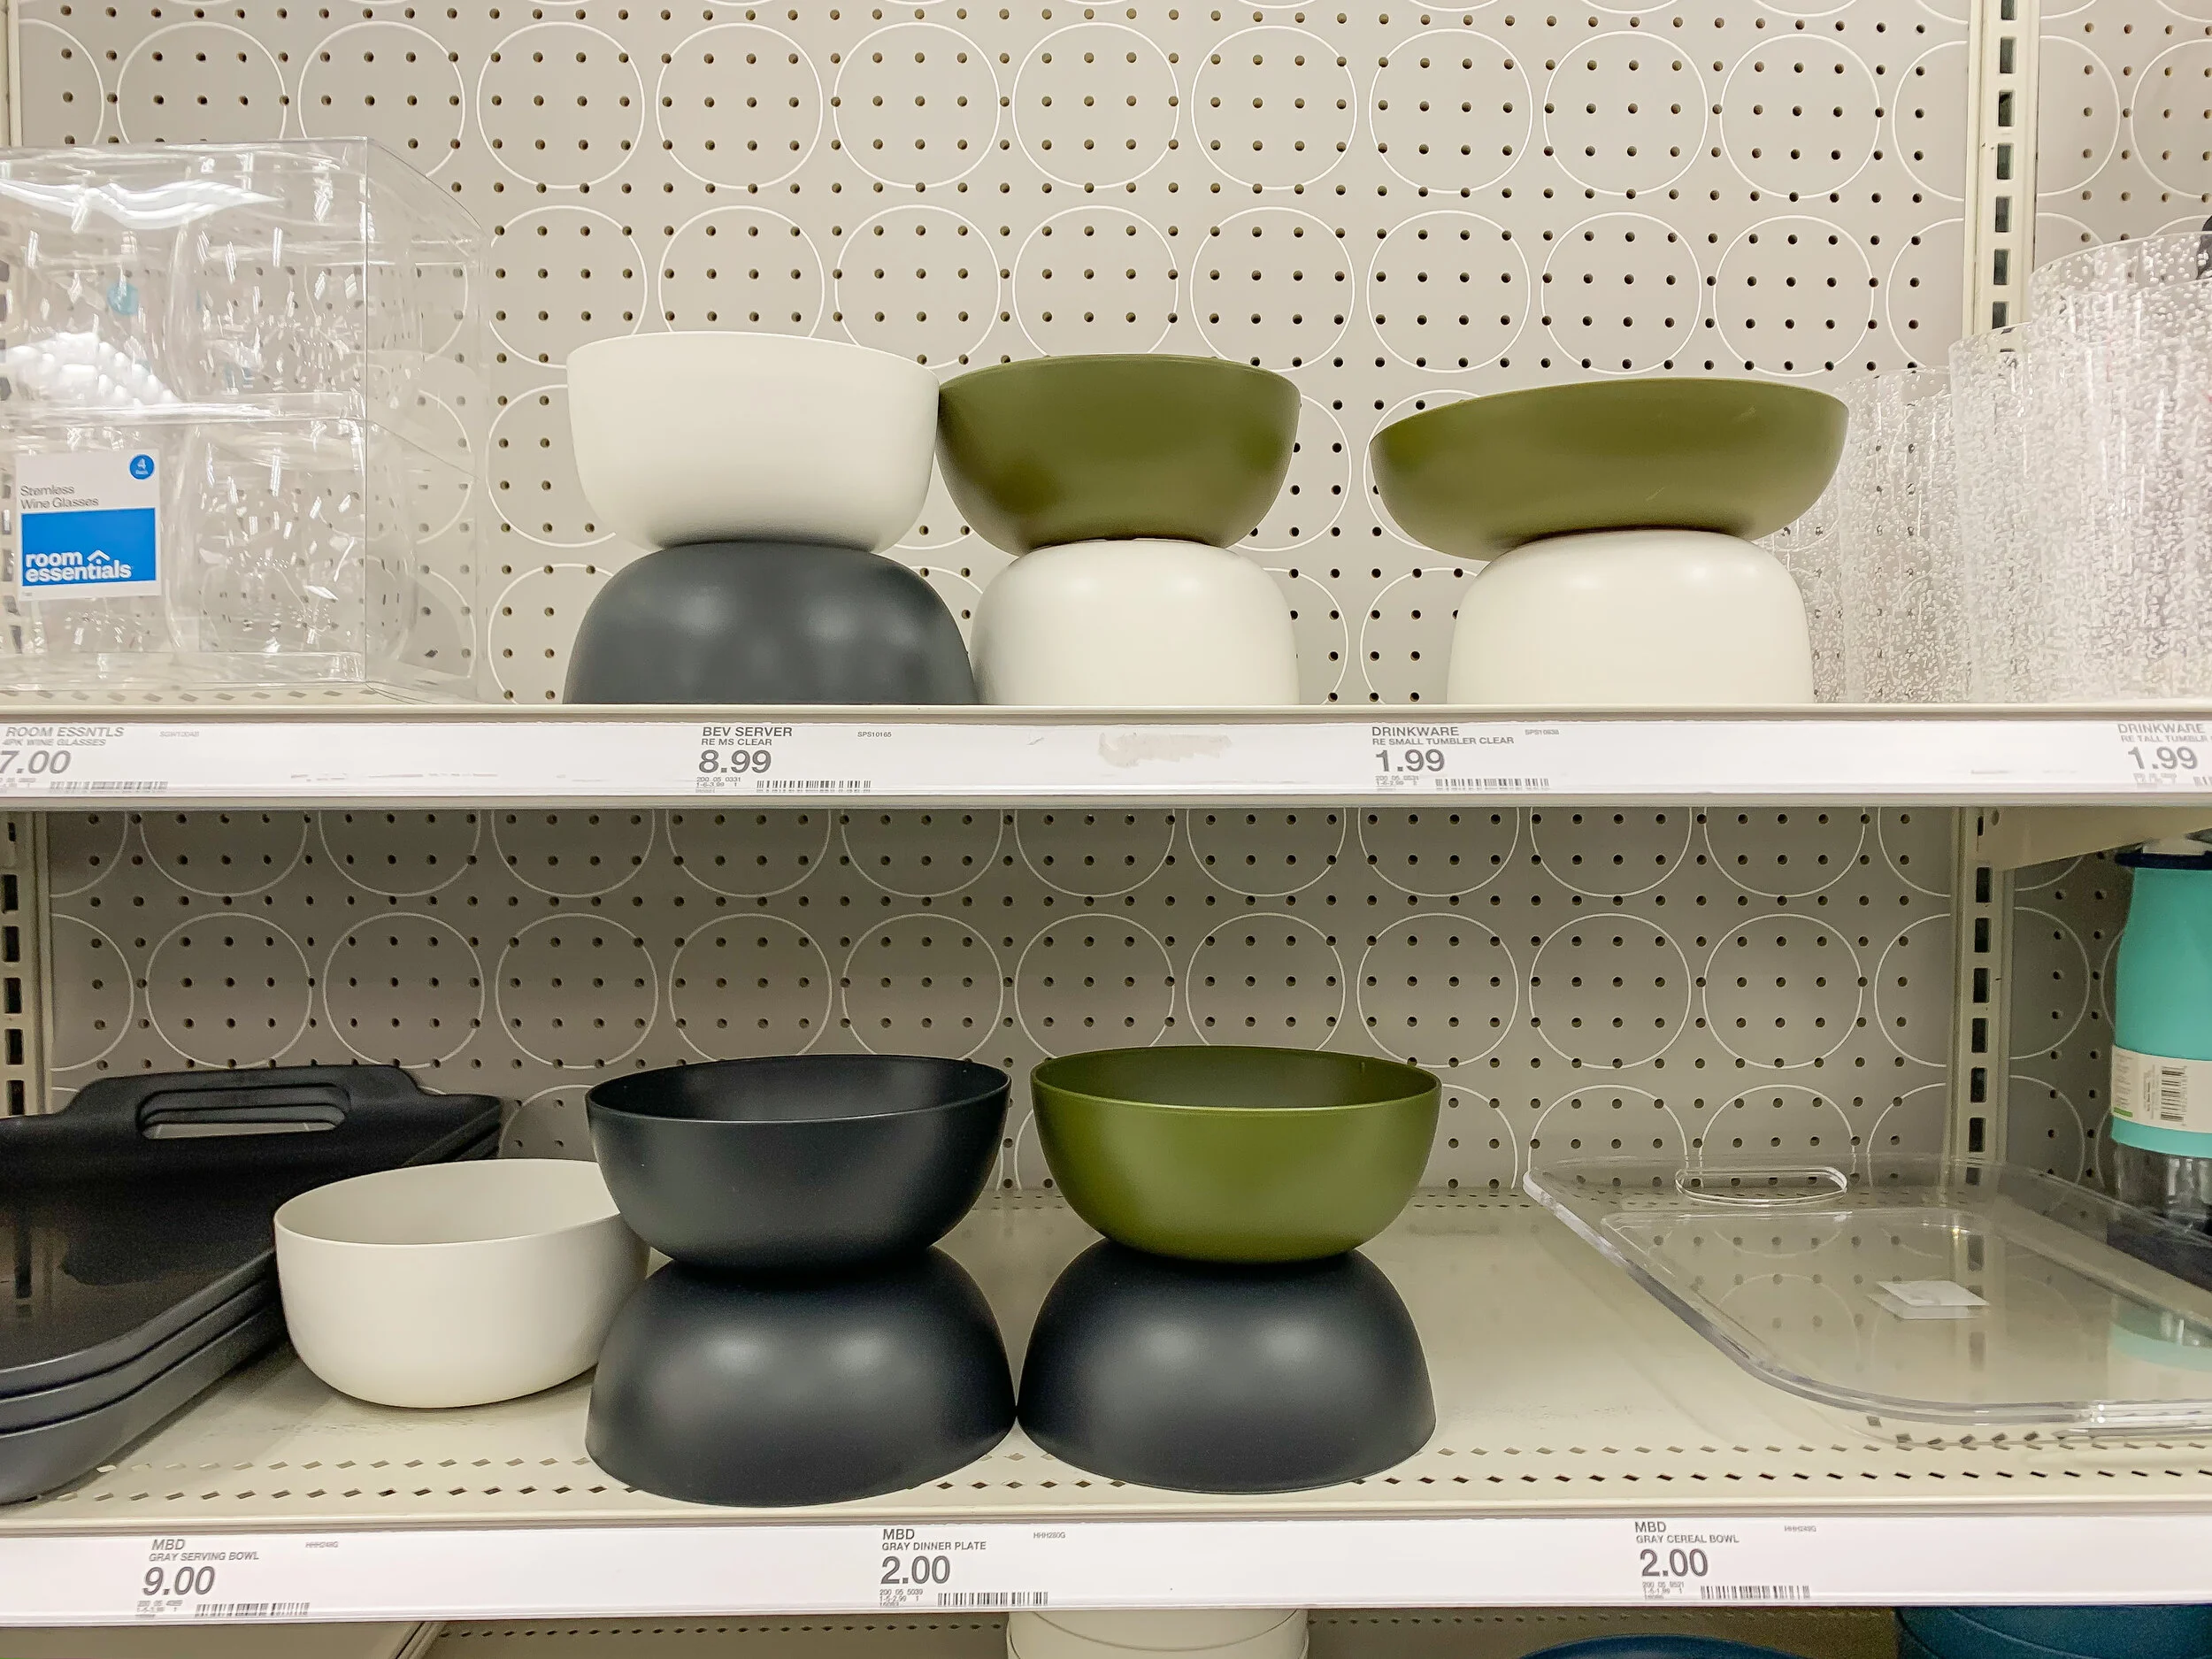
My situation in the aisle at Target. There were so many options!
So I bought several and took them home, with the intention of creating my own little people planters. Guys, this project was super fun and really made easy with my Cricut Joy. And I’m sharing my Cricut files for FREE if you’d like to make some yourself!
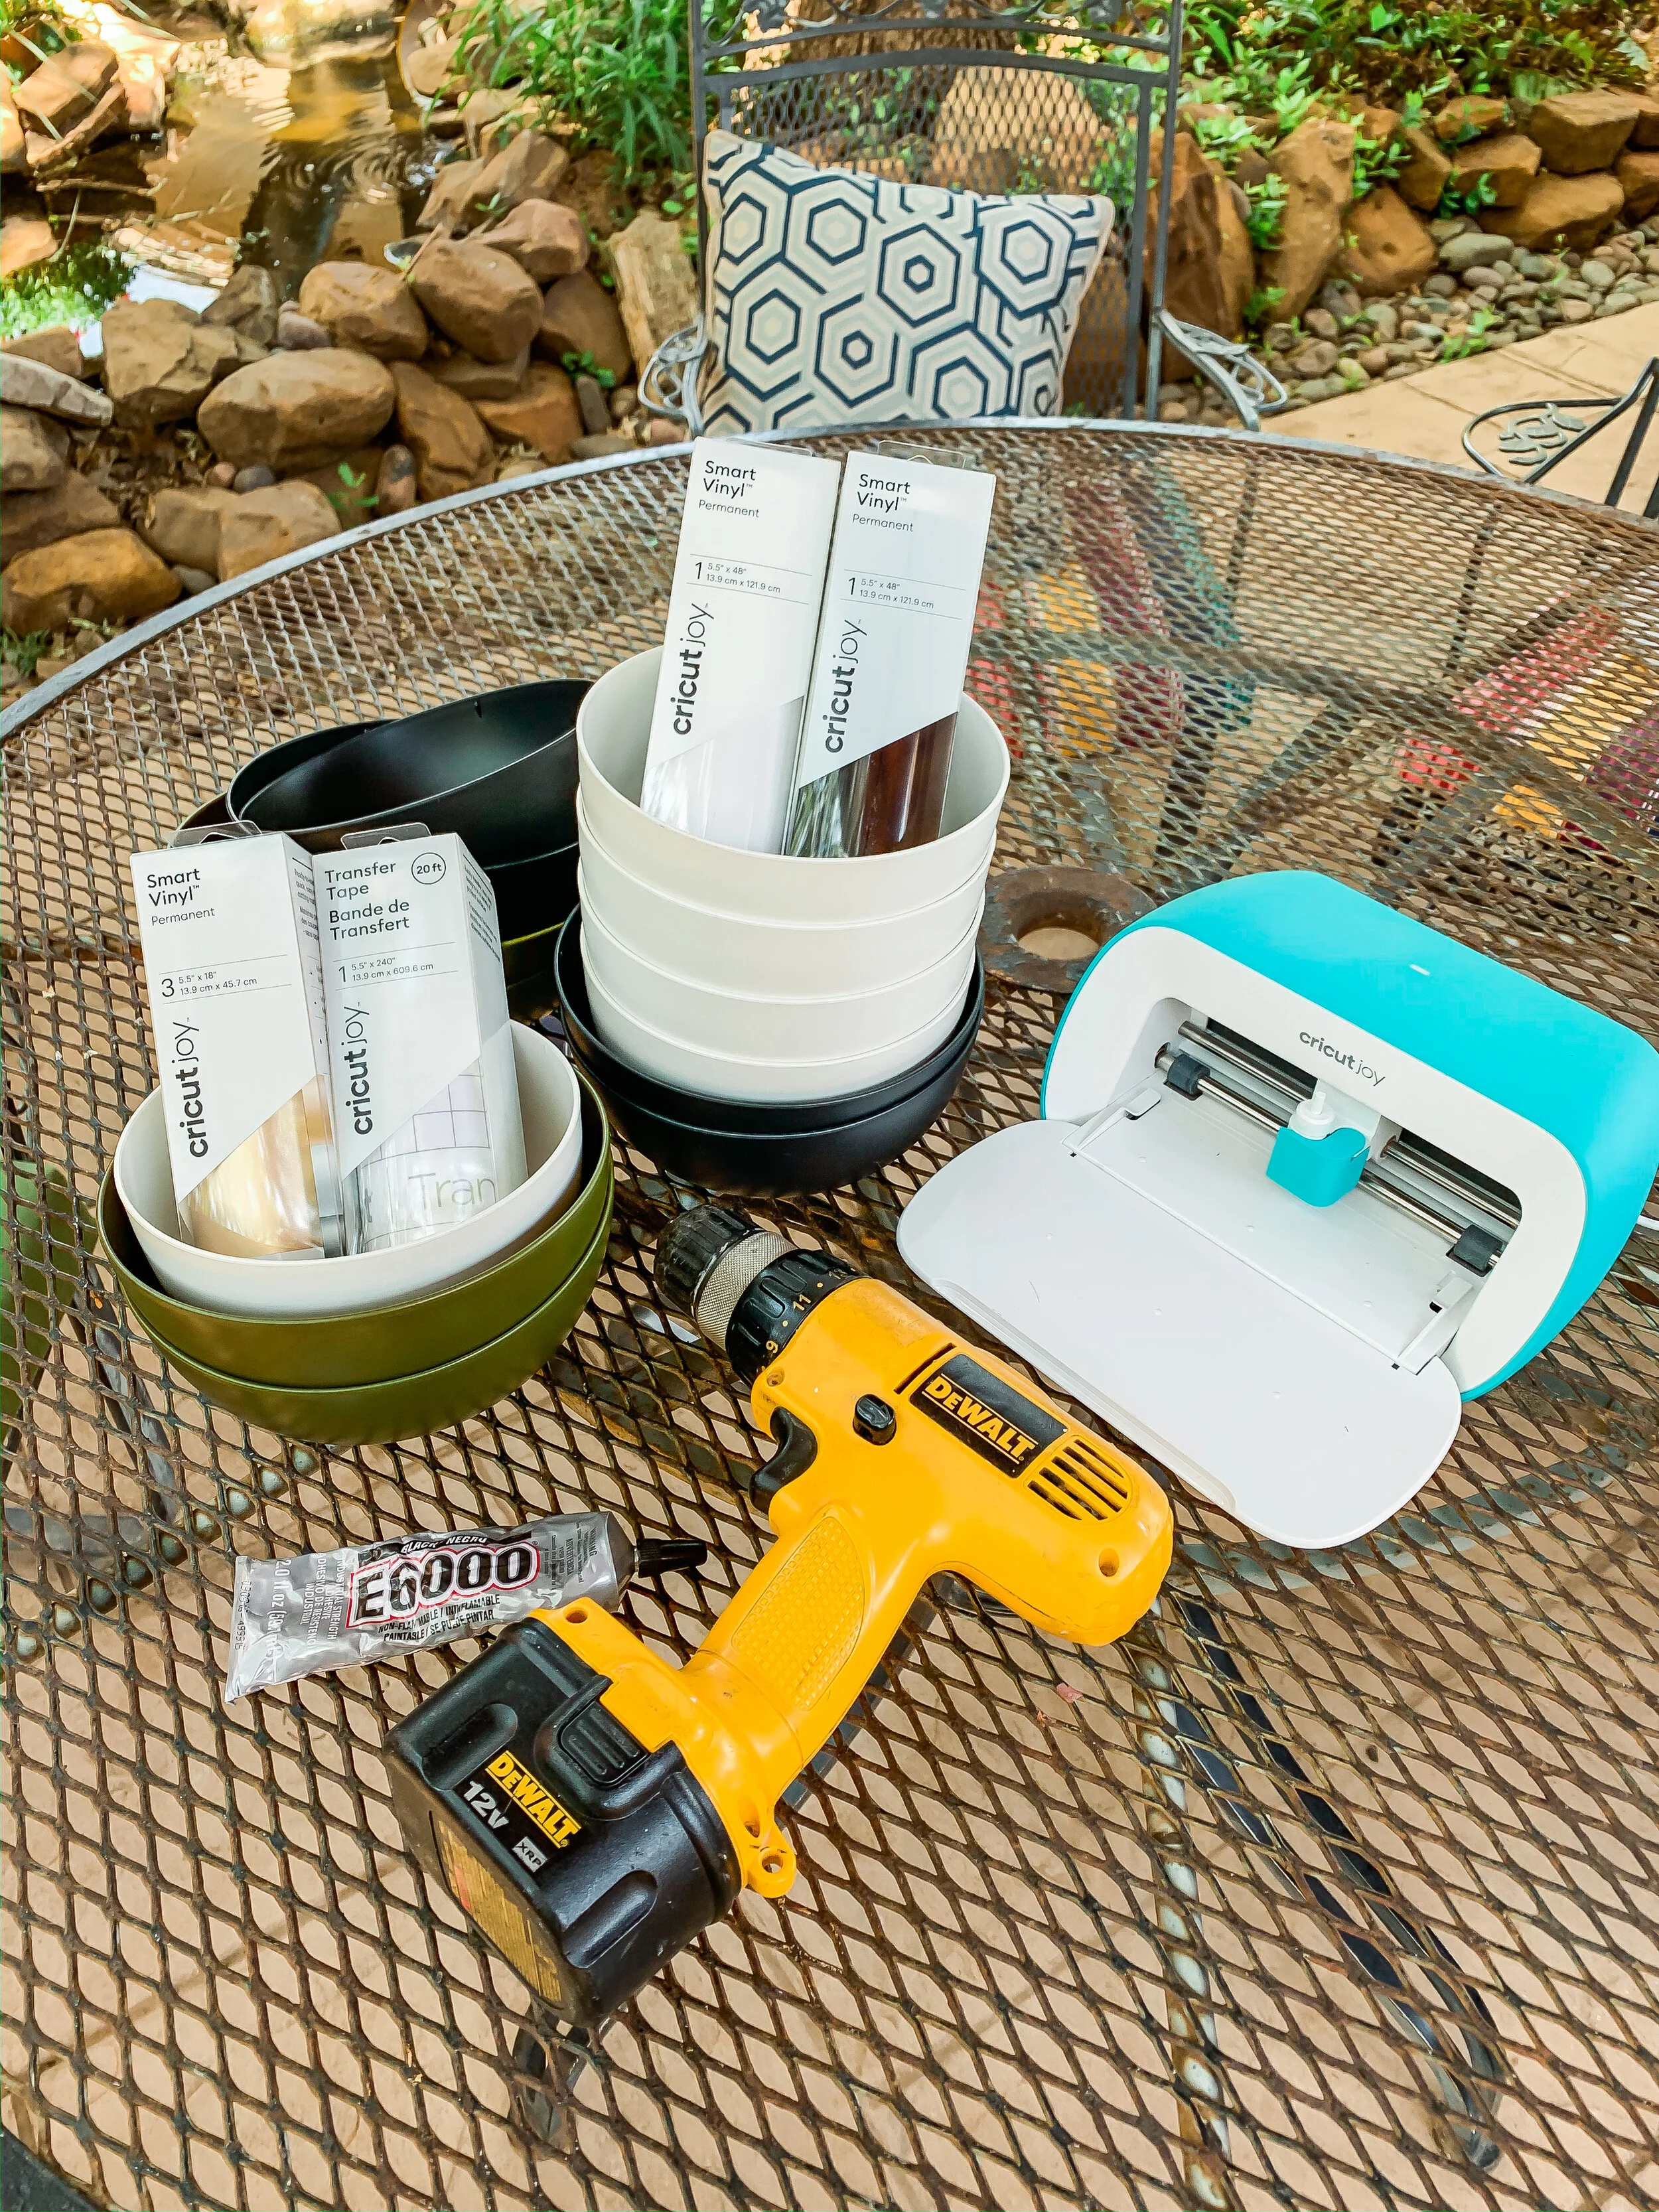
What you’ll need:
Plastic bowls (these I got from Target, any should work as long as they aren’t super thick), 2 per planter
Drill with Spade Bit
E600 Glue (or equivalent)
Cricut Joy (any Cricut machine can make this project- but this one is perfect for the Joy!)
Cricut Joy Smart Vinyl (I LOVE the smart vinyl. It is already perfectly sized for the Joy and doesn’t require a mat, which saves me a couple steps!) In this project, I used:
Cricut Weeding Tool and Spatula (I used to try to get by without these two items- NOT worth it! They make life so much easier and quicker- plus have you seen this new gold set?!)
Potting Soil & Plants
Let’s get started!
First, you’ll need to decide the configuration of your planters- I did a combination of sizes and colors, but in the end, my personal faves were the symmetrical, same-colored ones. Let your imagination run wild!

Next, glue your bowls together. There is no magic here- just literally put glue on the bottom of one of the bowls and press them together. The E6000 is great at gluing literally anything together, and is watertight, so it won’t be bothered by watering later. Just make sure you get enough on there to create a good seal without it spilling over. I left the bowls like this for about 24 hours just to ensure that the glue had dried completely before drilling.
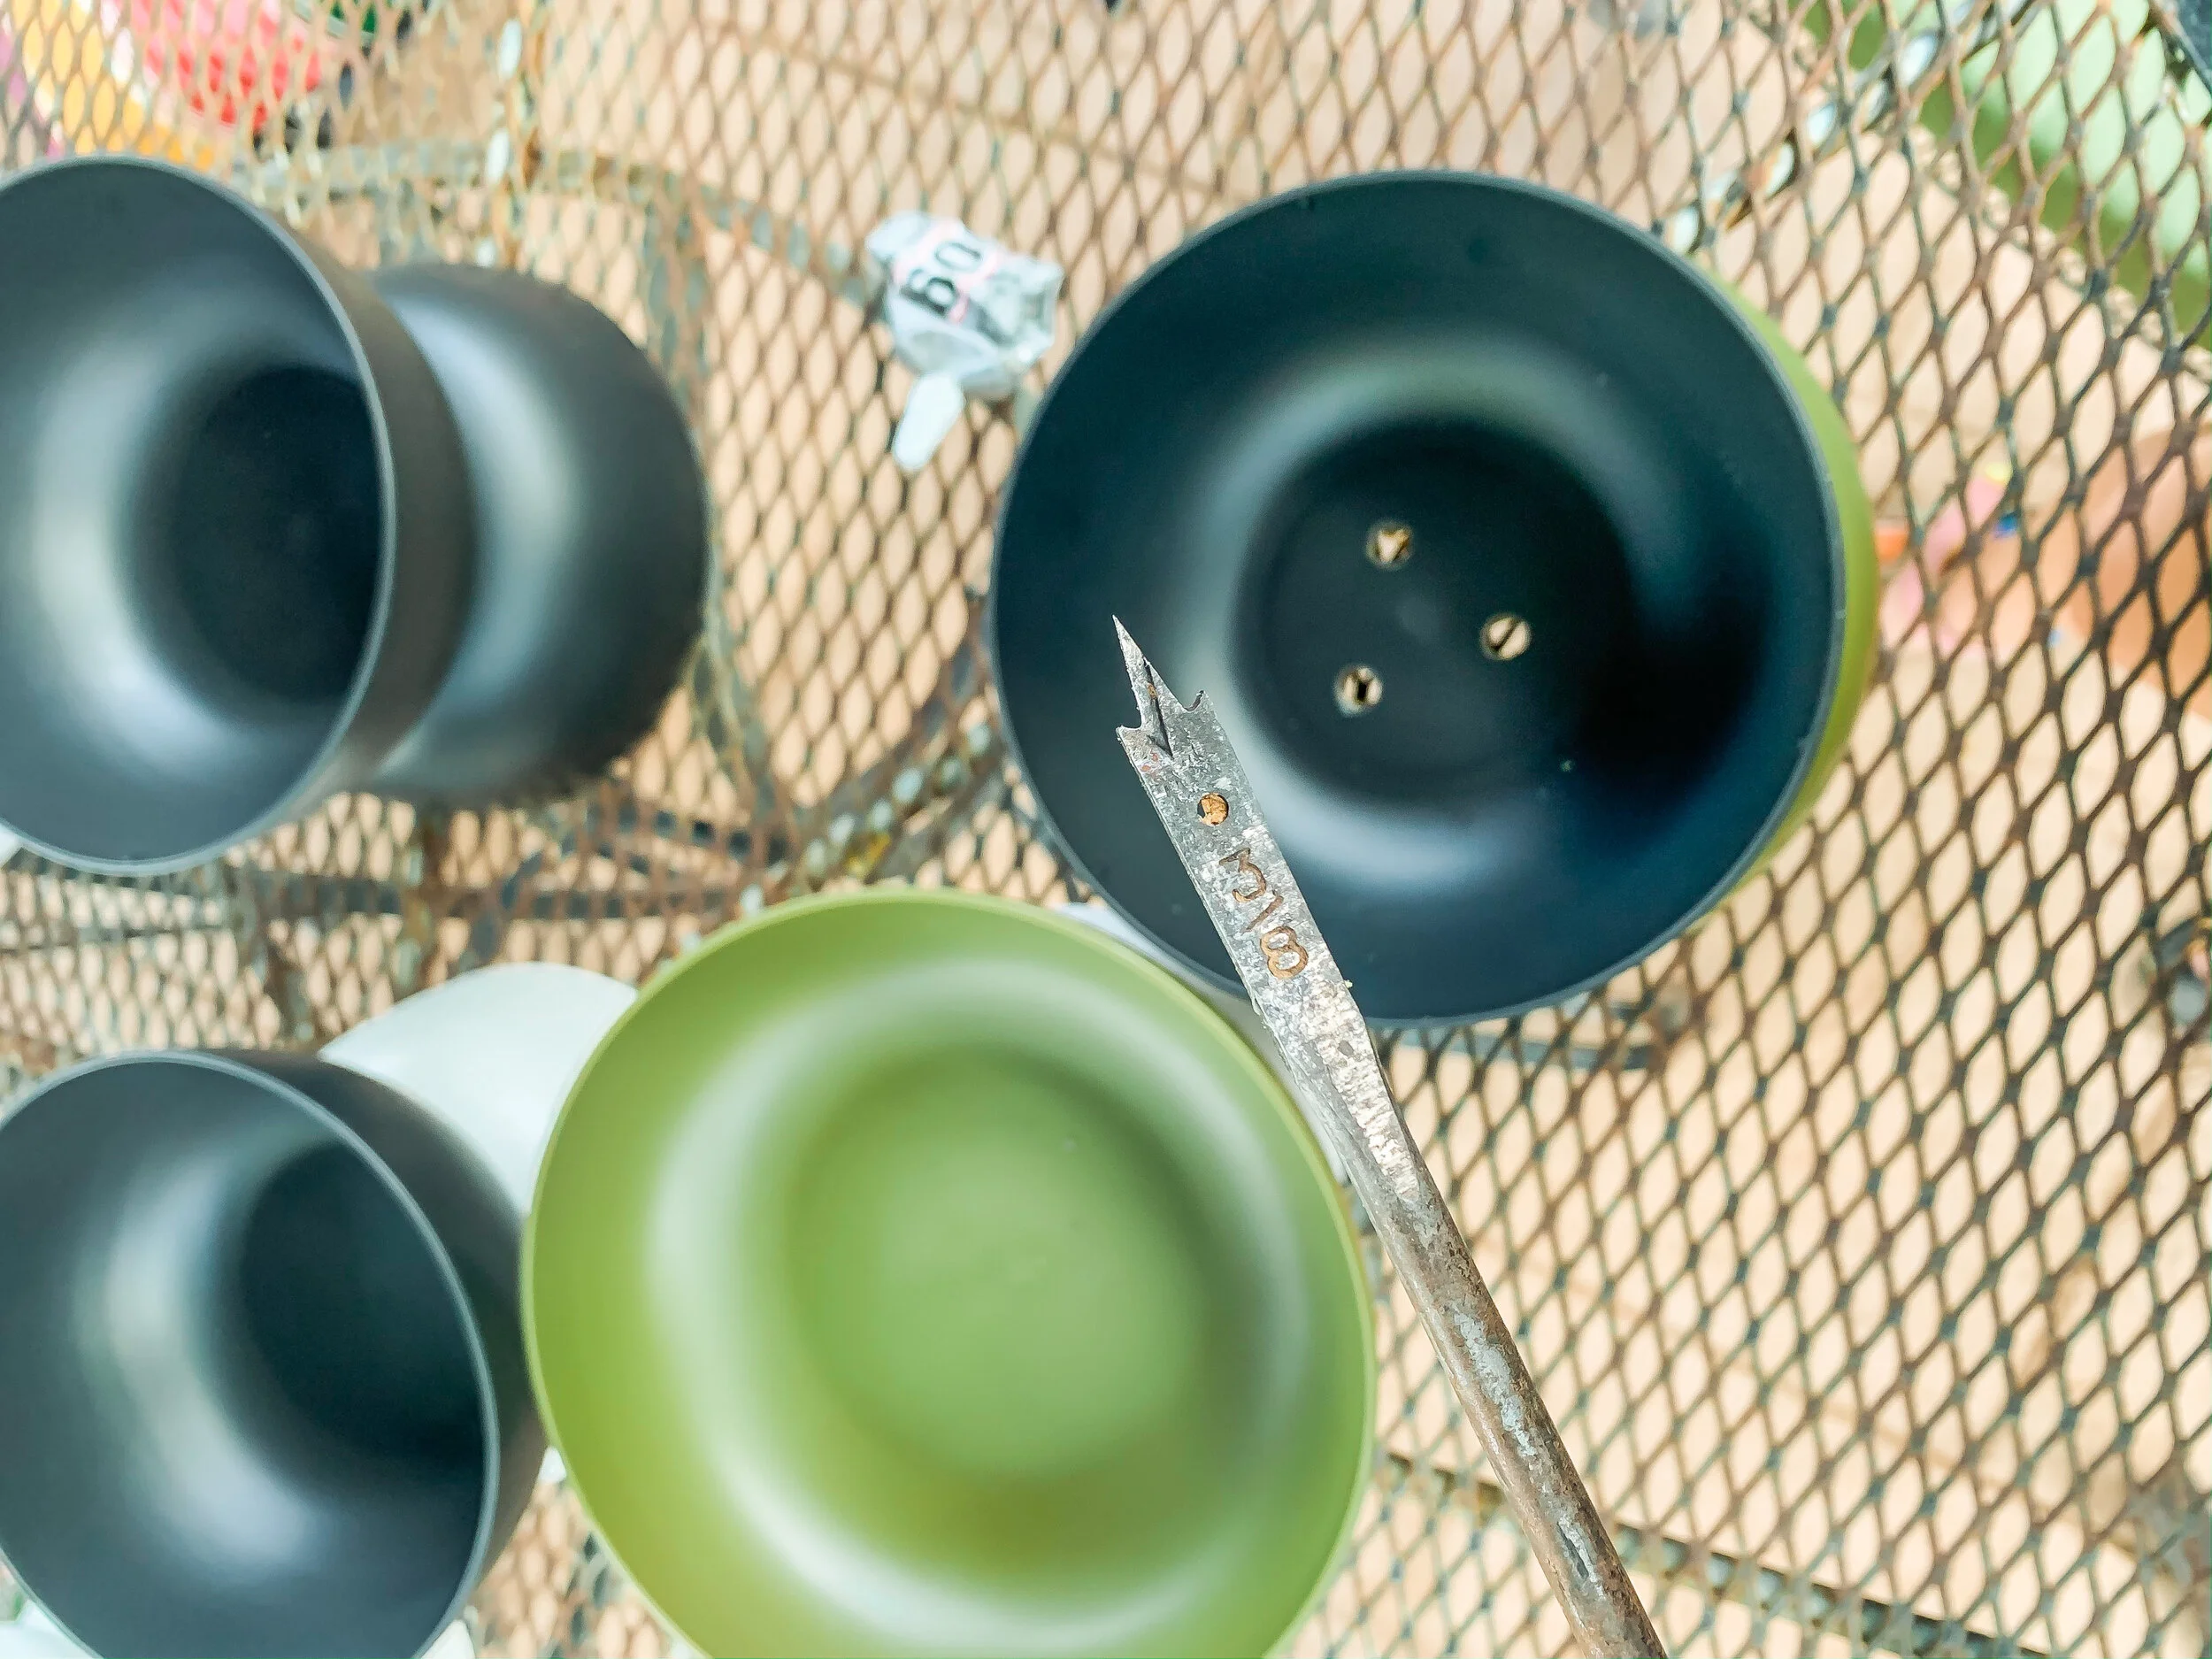
Next, drill some drainage holes in the bowls. You will want to use a spade bit, which has a sharper point in the middle that widens to create a larger hole. I used a 3/8 size here. If you’ve never used one of these before, don’t be intimidated! Make sure you have a sturdy surface and you are able to center yourself and the drill over the bowls. The more pliable the plastic, the easier it will be to drill through- but even if you have a harder plastic bowl, it should still work.
I ended up doing only 2 holes on the rest of the bowls because I felt like it was plenty of drainage.
Next, it’s time to cut your people illustrations! I created mine using the Procreate app on my iPad pro- but you could also create your own in the Cricut Design Space. If you’d like to recreate some of my quirky people, I’m linking them here for you- free!
My kids named all the characters so you can thank them for that. :) Click on any image below and it will take you to the appropriate file in Cricut Design Space.

Fred Cricut File
Quirky People Planter Cricut File

Jeff Cricut File
Quirky People Planter Cricut File

Curly Shirley
Cricut File
Quirky People Planter Cricut File

Captain Erica Cricut File
Quirky People Planter Cricut File
Bart Cricut File
Quirky People Planter Cricut File
Once you click on the file link you would like to create, you will need to size it to fit your pot. The face and shirt files are combined into the same file, but I applied them to the planter separately- even separating sleeves from buttons and collars, so that I could place them where I wanted.
Measure the height of the top bowl so that you can appropriately size your face to fit. I didn’t worry so much about the width of the face, since it can curve around the bowl. I used a sewing tape measure for this. Most of the face files ended up being around 3 inches in height. If it became too wide for the Joy (wider than 5 inches), I simply rotated it so that it fit within the size constraints of the Joy.
Do the same for the bottom of your planter with the shirt and sleeves portions. If they became too tall for the bowl, I just folded it over the edge or cut the vinyl to fit when I placed it.
As I mentioned before, the Cricut Joy makes this process really easy- especially if you are using Smart Vinyl. It’s already the perfect width for the Joy and doesn’t require a mat, so that’s one less step in the creation process!

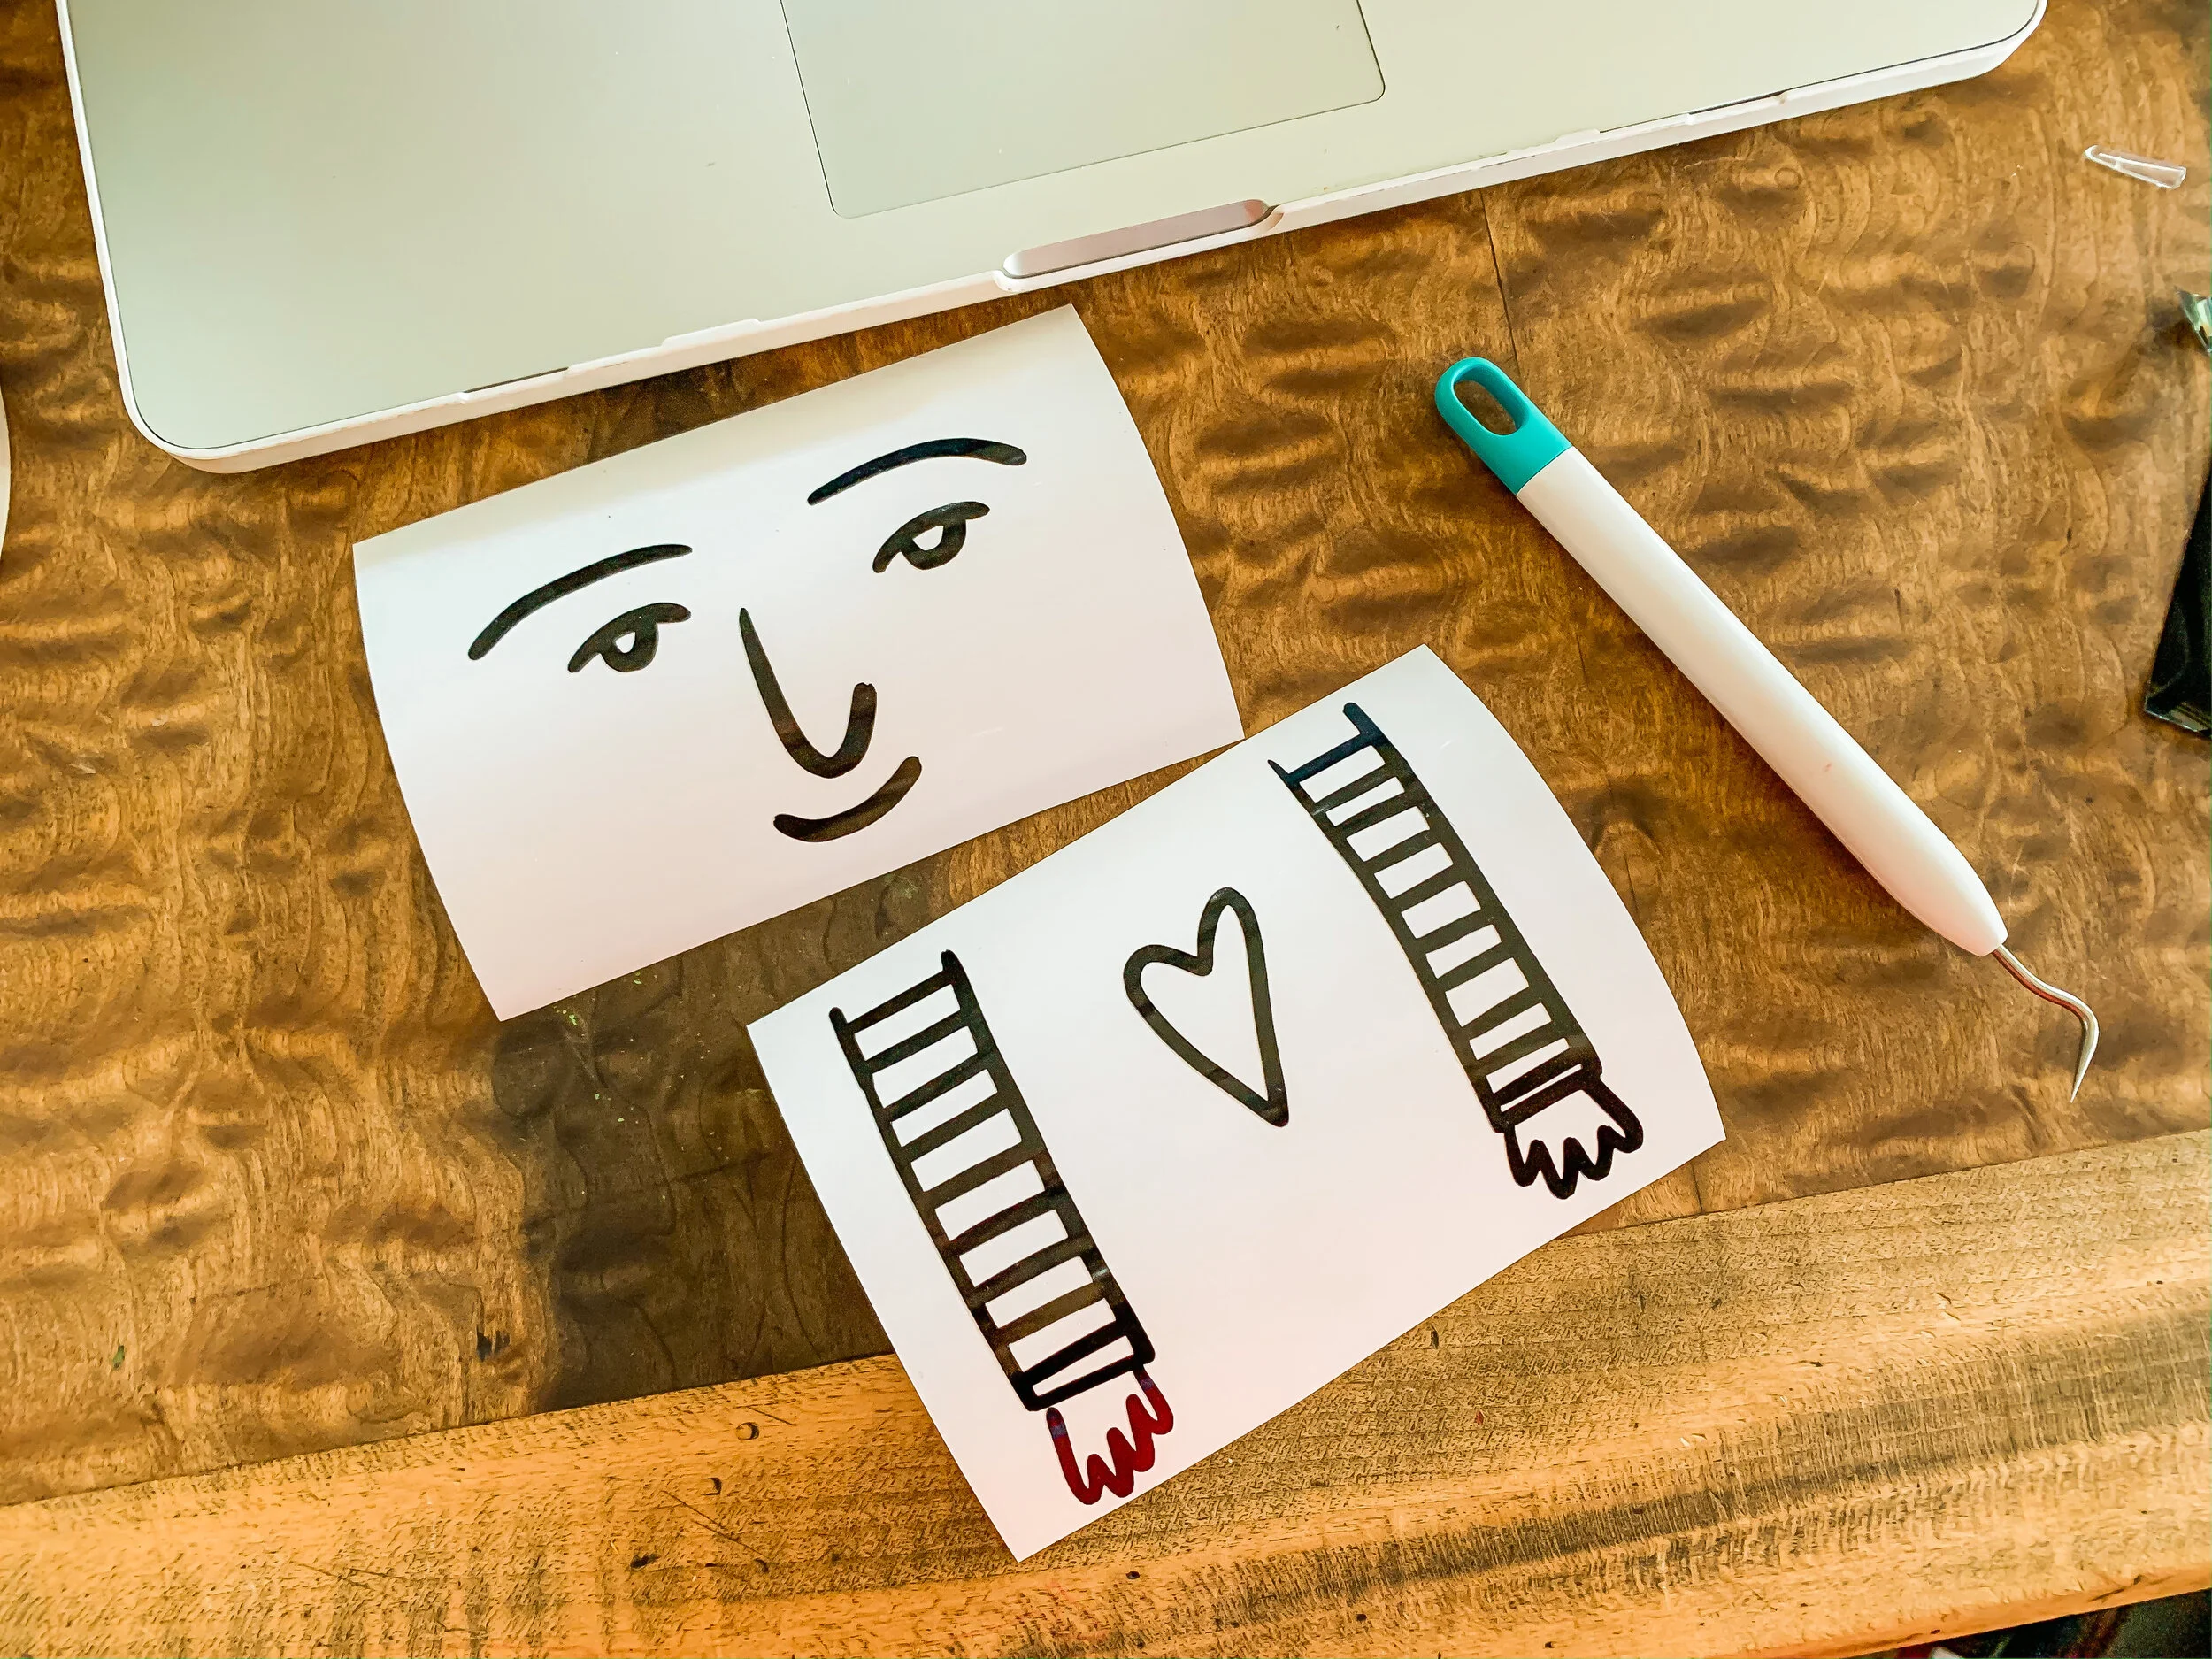
The Fred file cut and weeded. I separated the different parts- including each sleeve so that I could place them right where I wanted to.
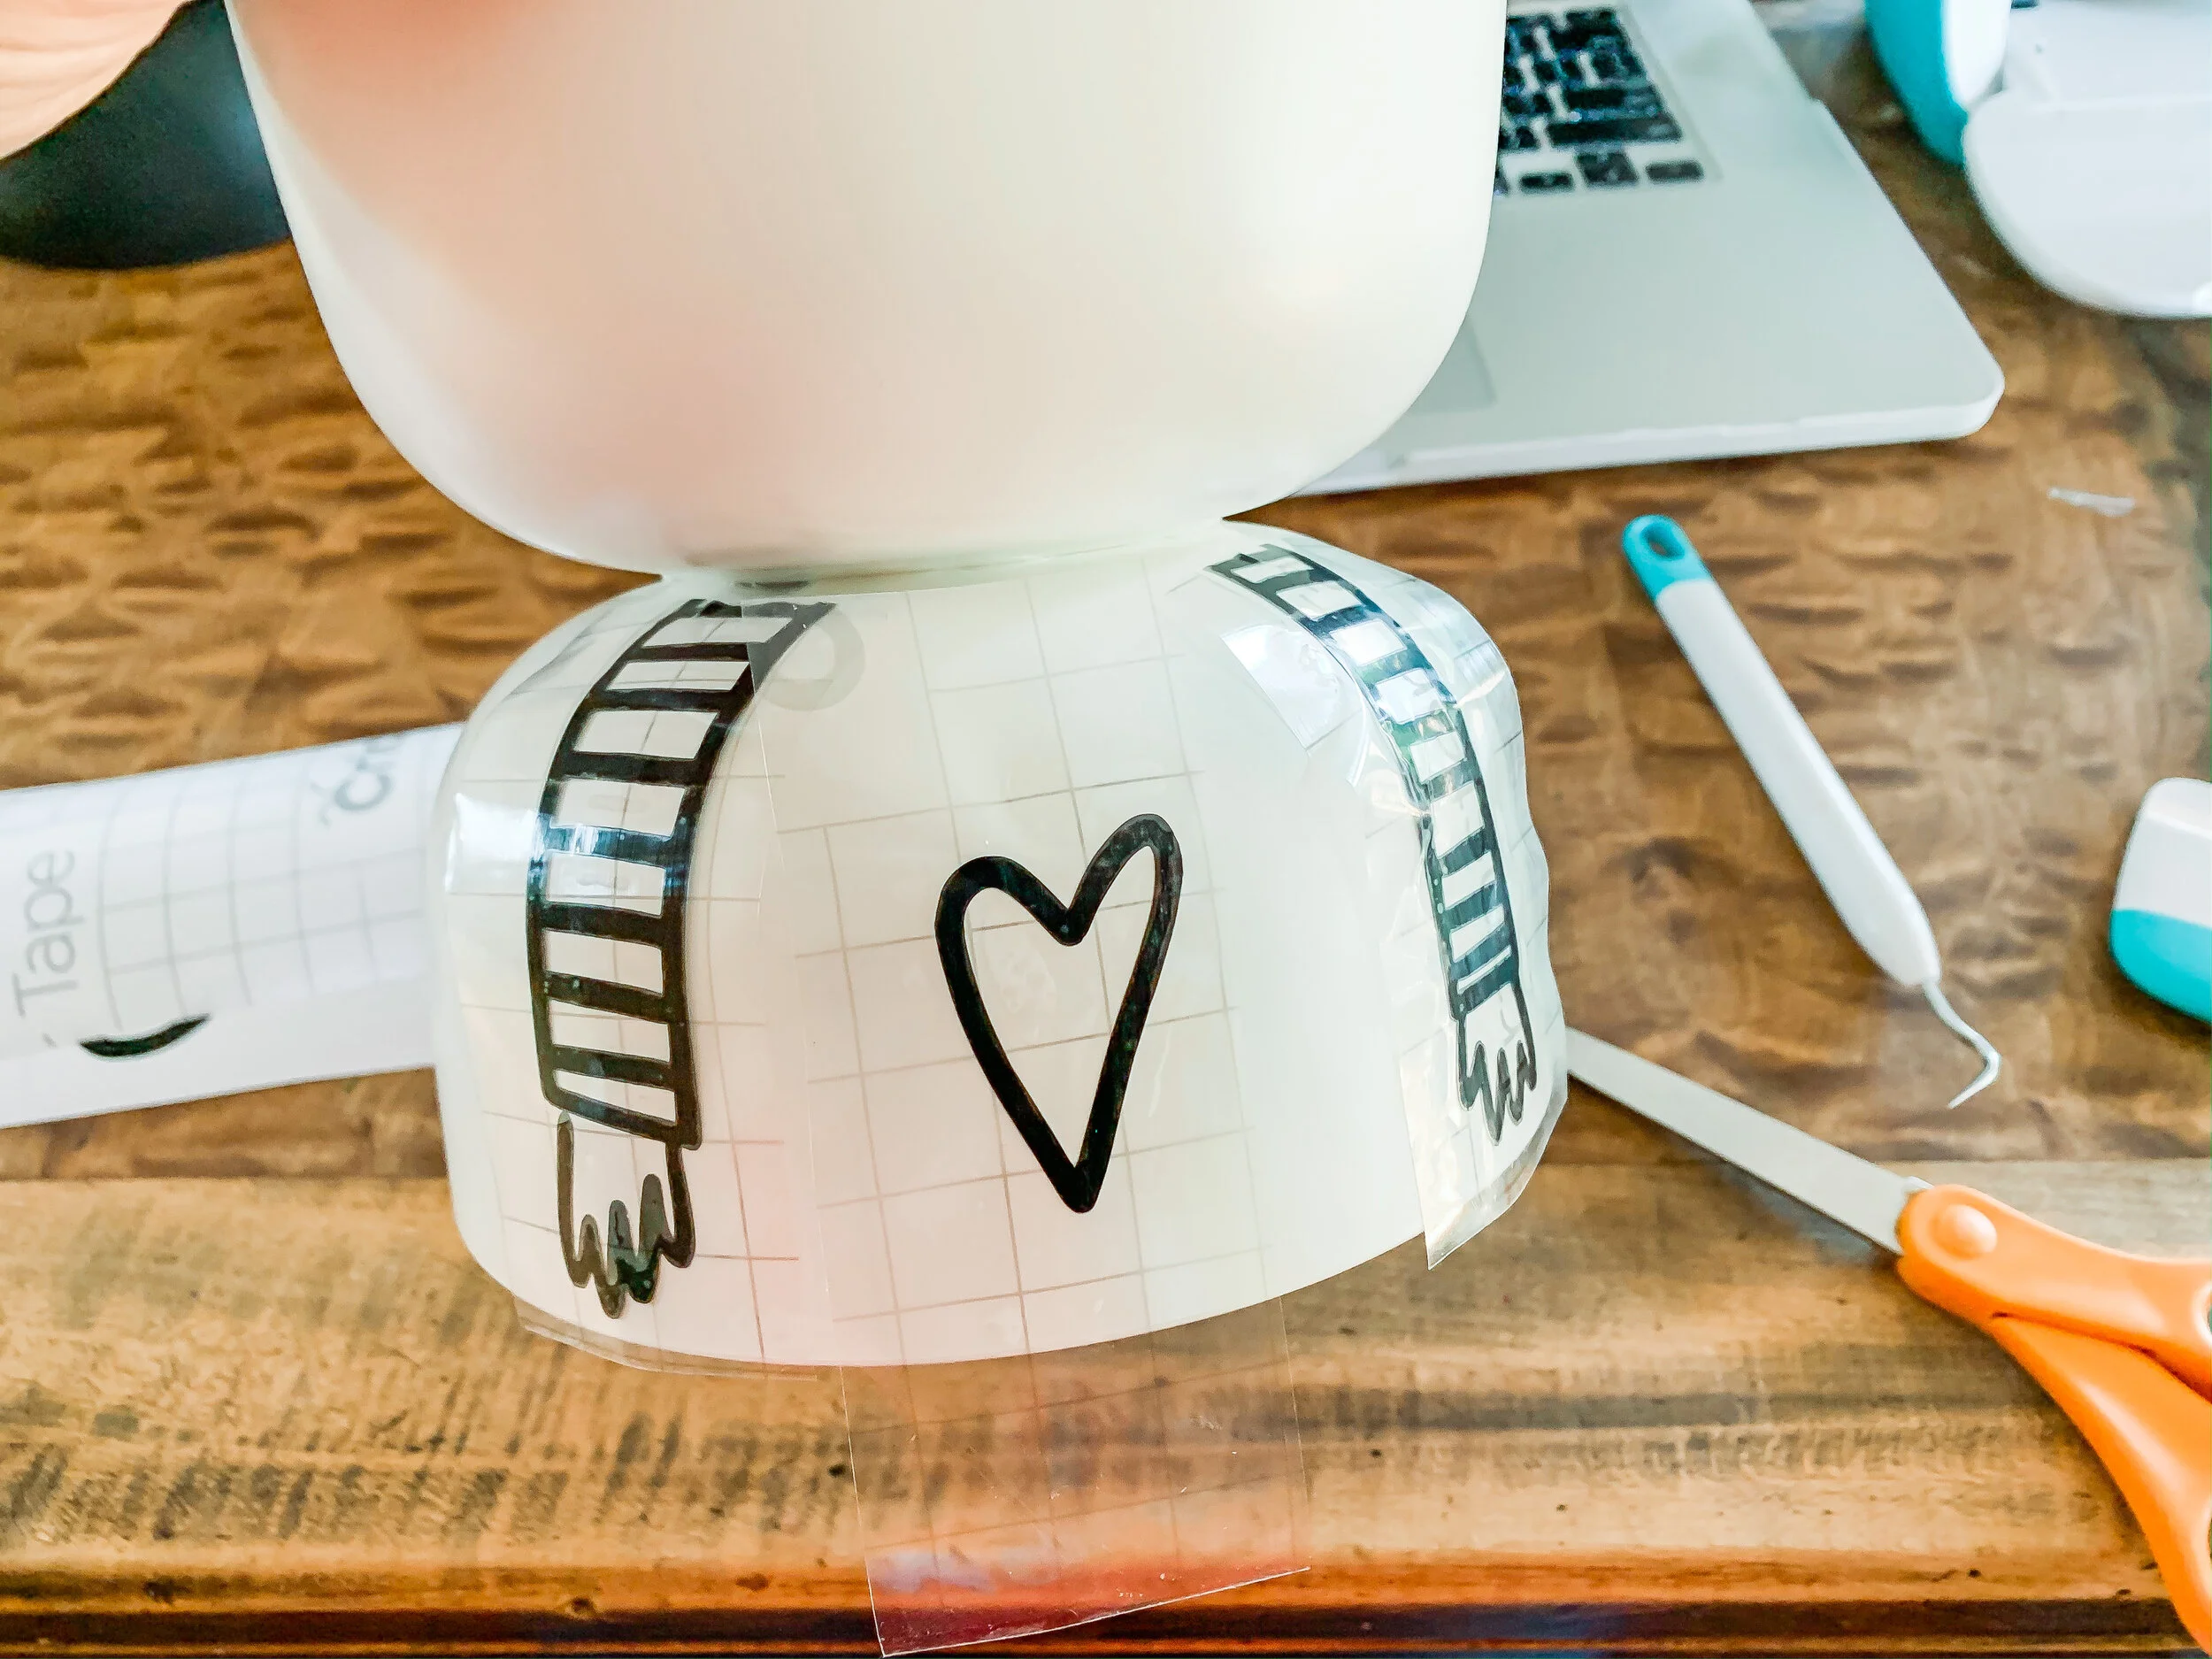
You can see how I placed them separately here- I always started at the bottom where the hands are and went up- if the vinyl was too long, I just cut it.
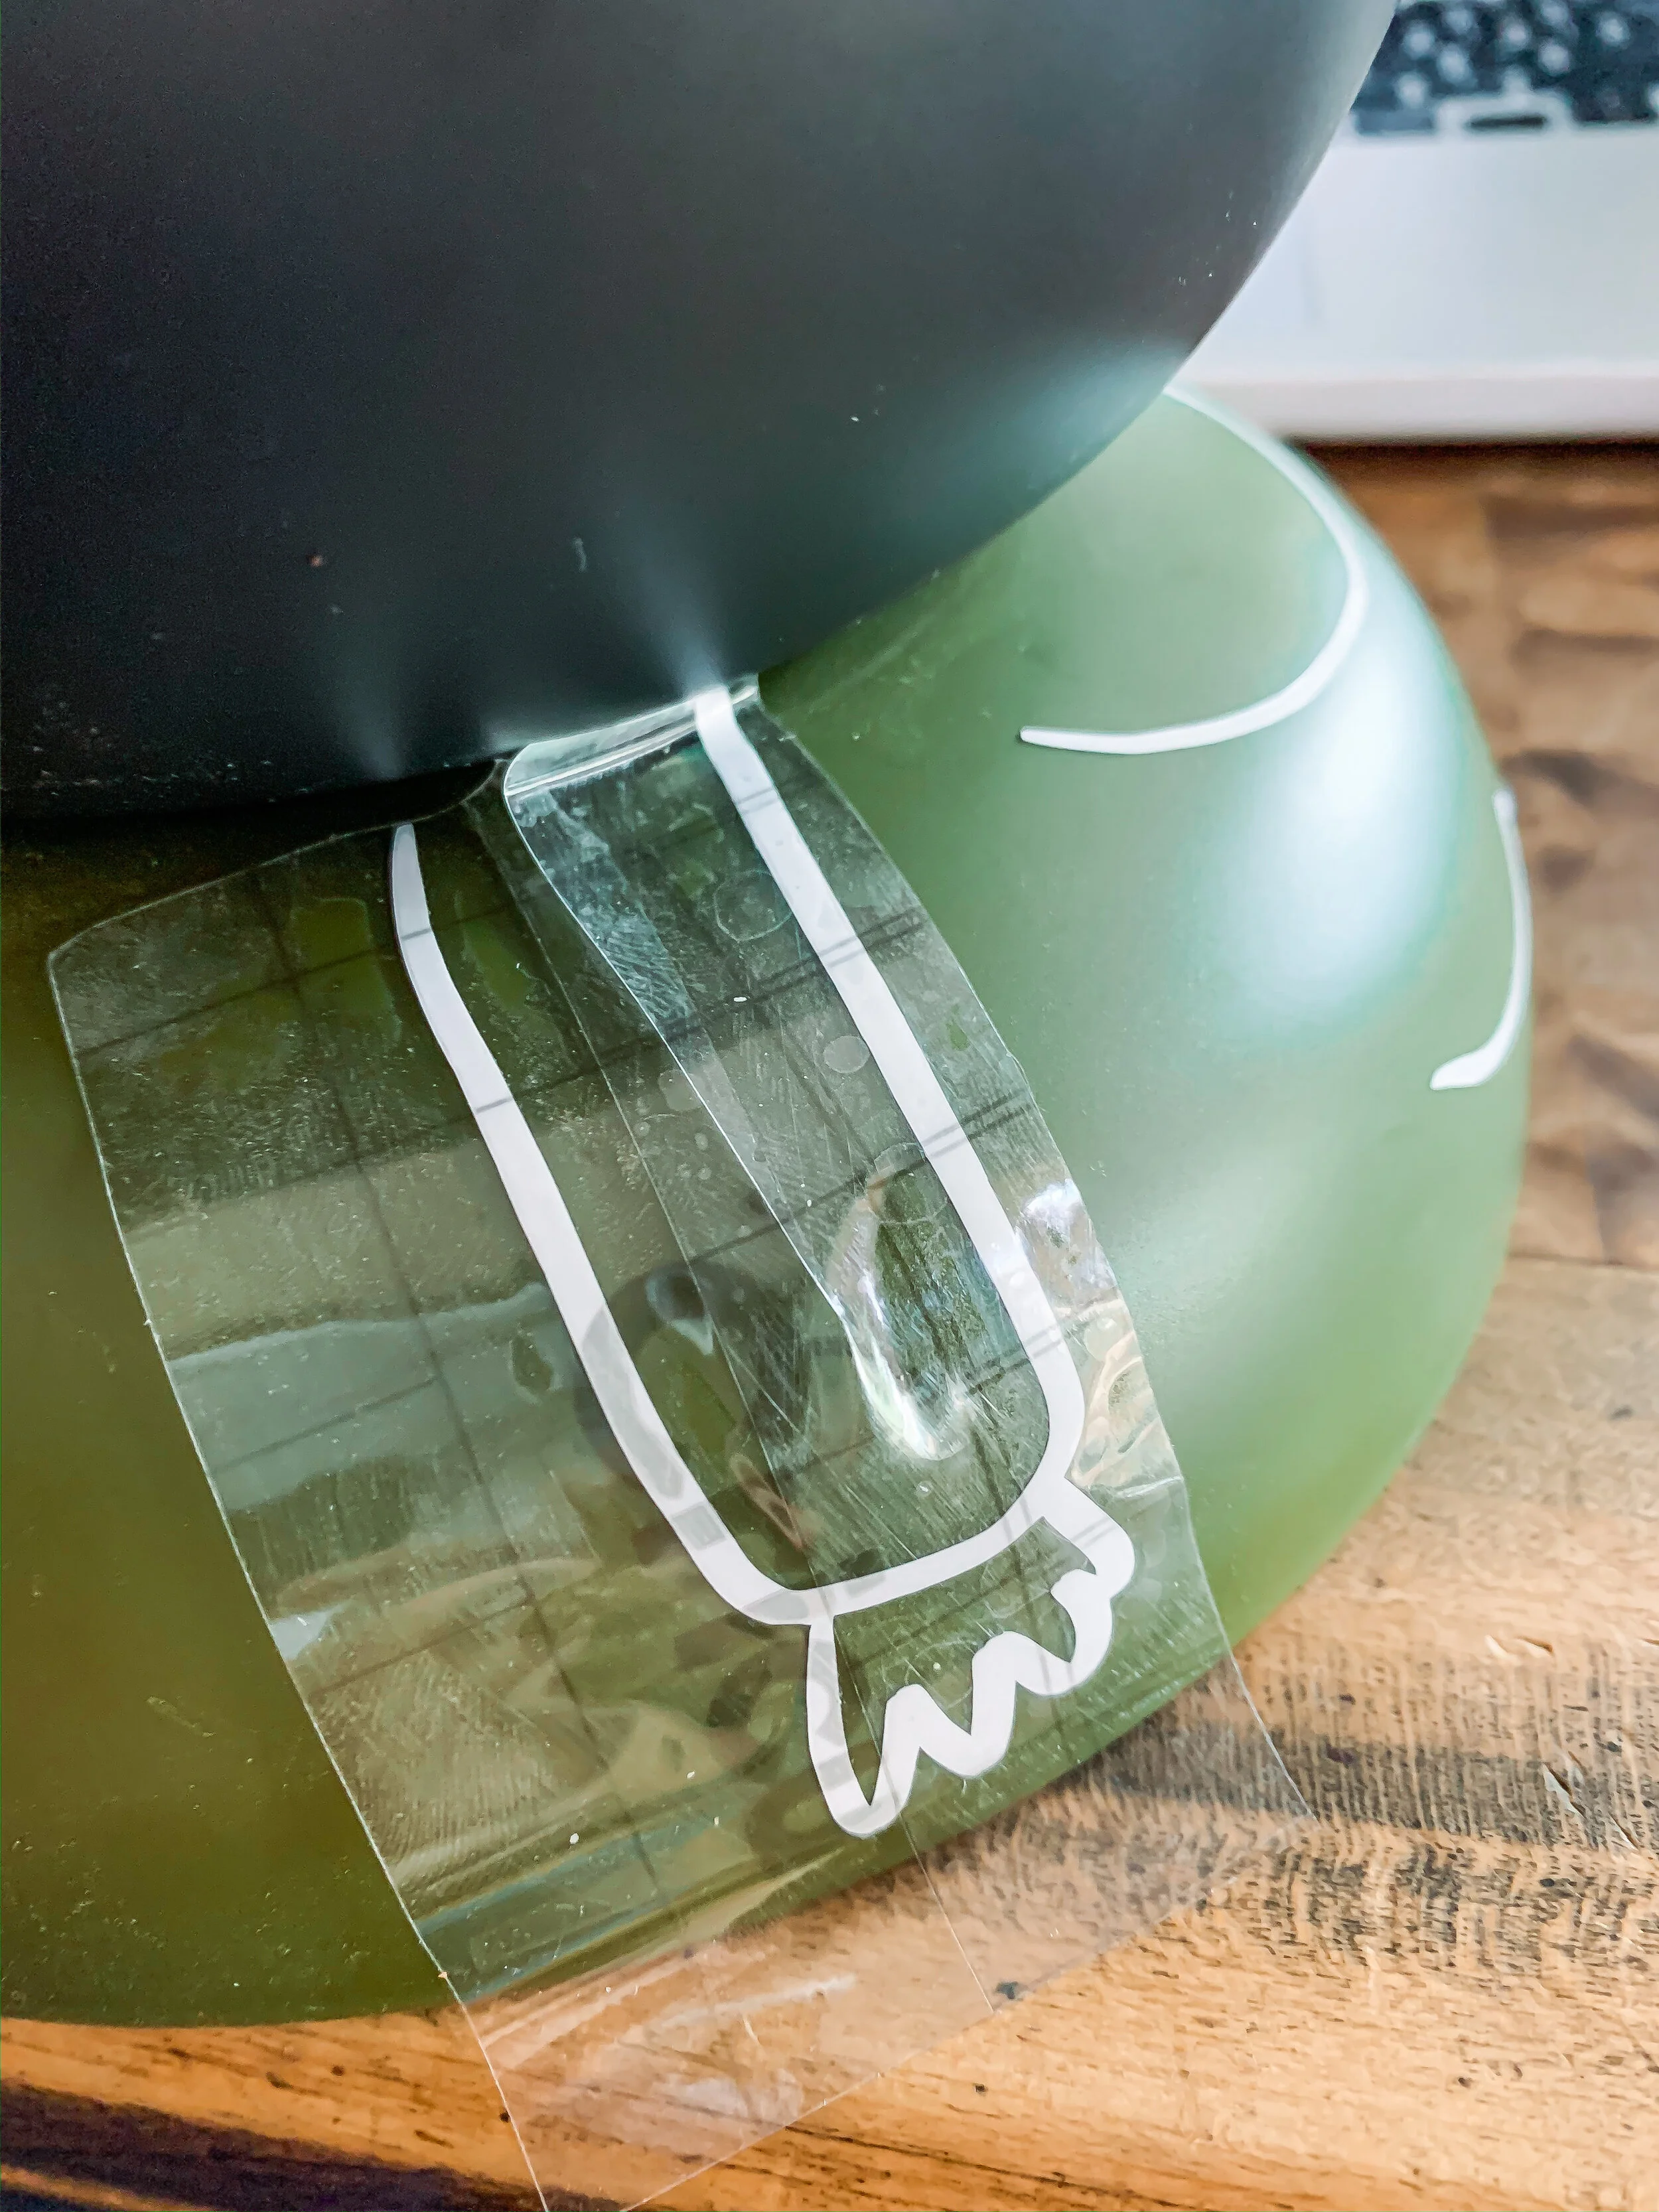
A little tip on placing things on rounded edges: I found it helpful to cut some slits in the transfer tape so that the vinyl would not fold or bubble when placing it. I also used the Cricut spatula to get the vinyl pressed down in the seam of the bowls.
To keep it simple, I did one color of vinyl on each person, but you could easily mix it up! I used black on Fred, white on Curly Shirley and Bart, shimmer gold on Jeff, and the new holographic gold on Captain Erica (don’t you love the names my kids gave them?!)
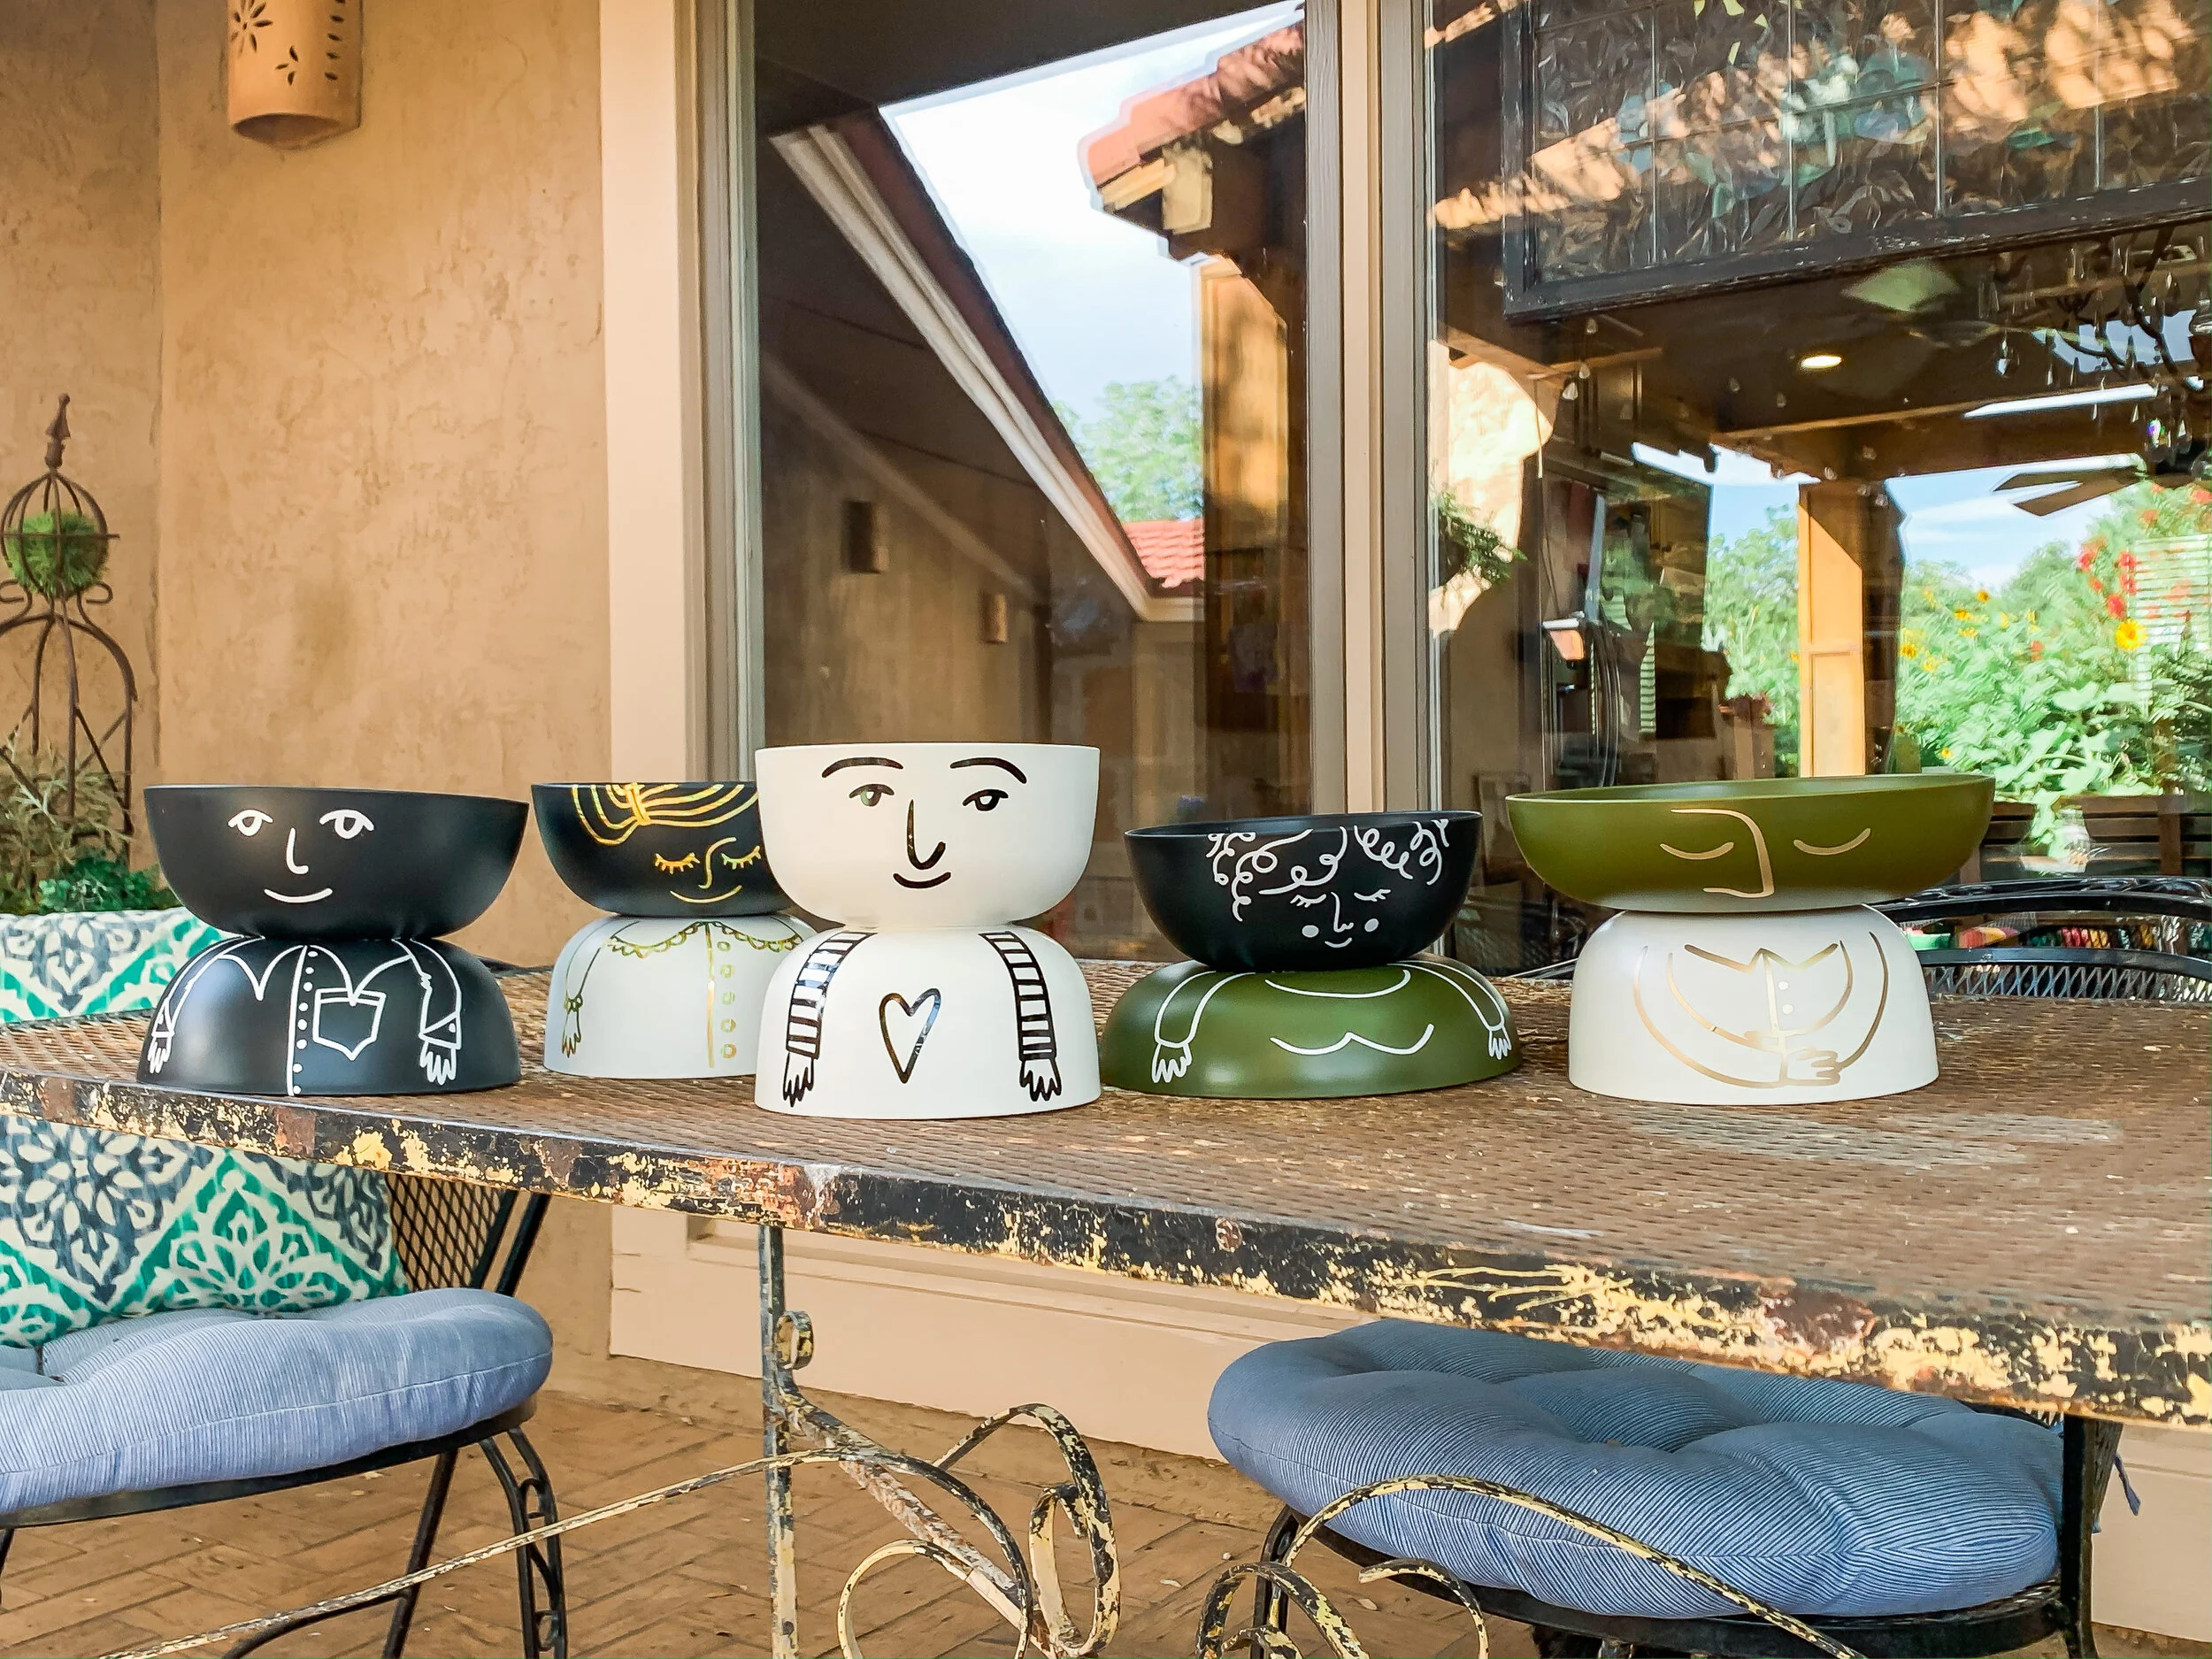
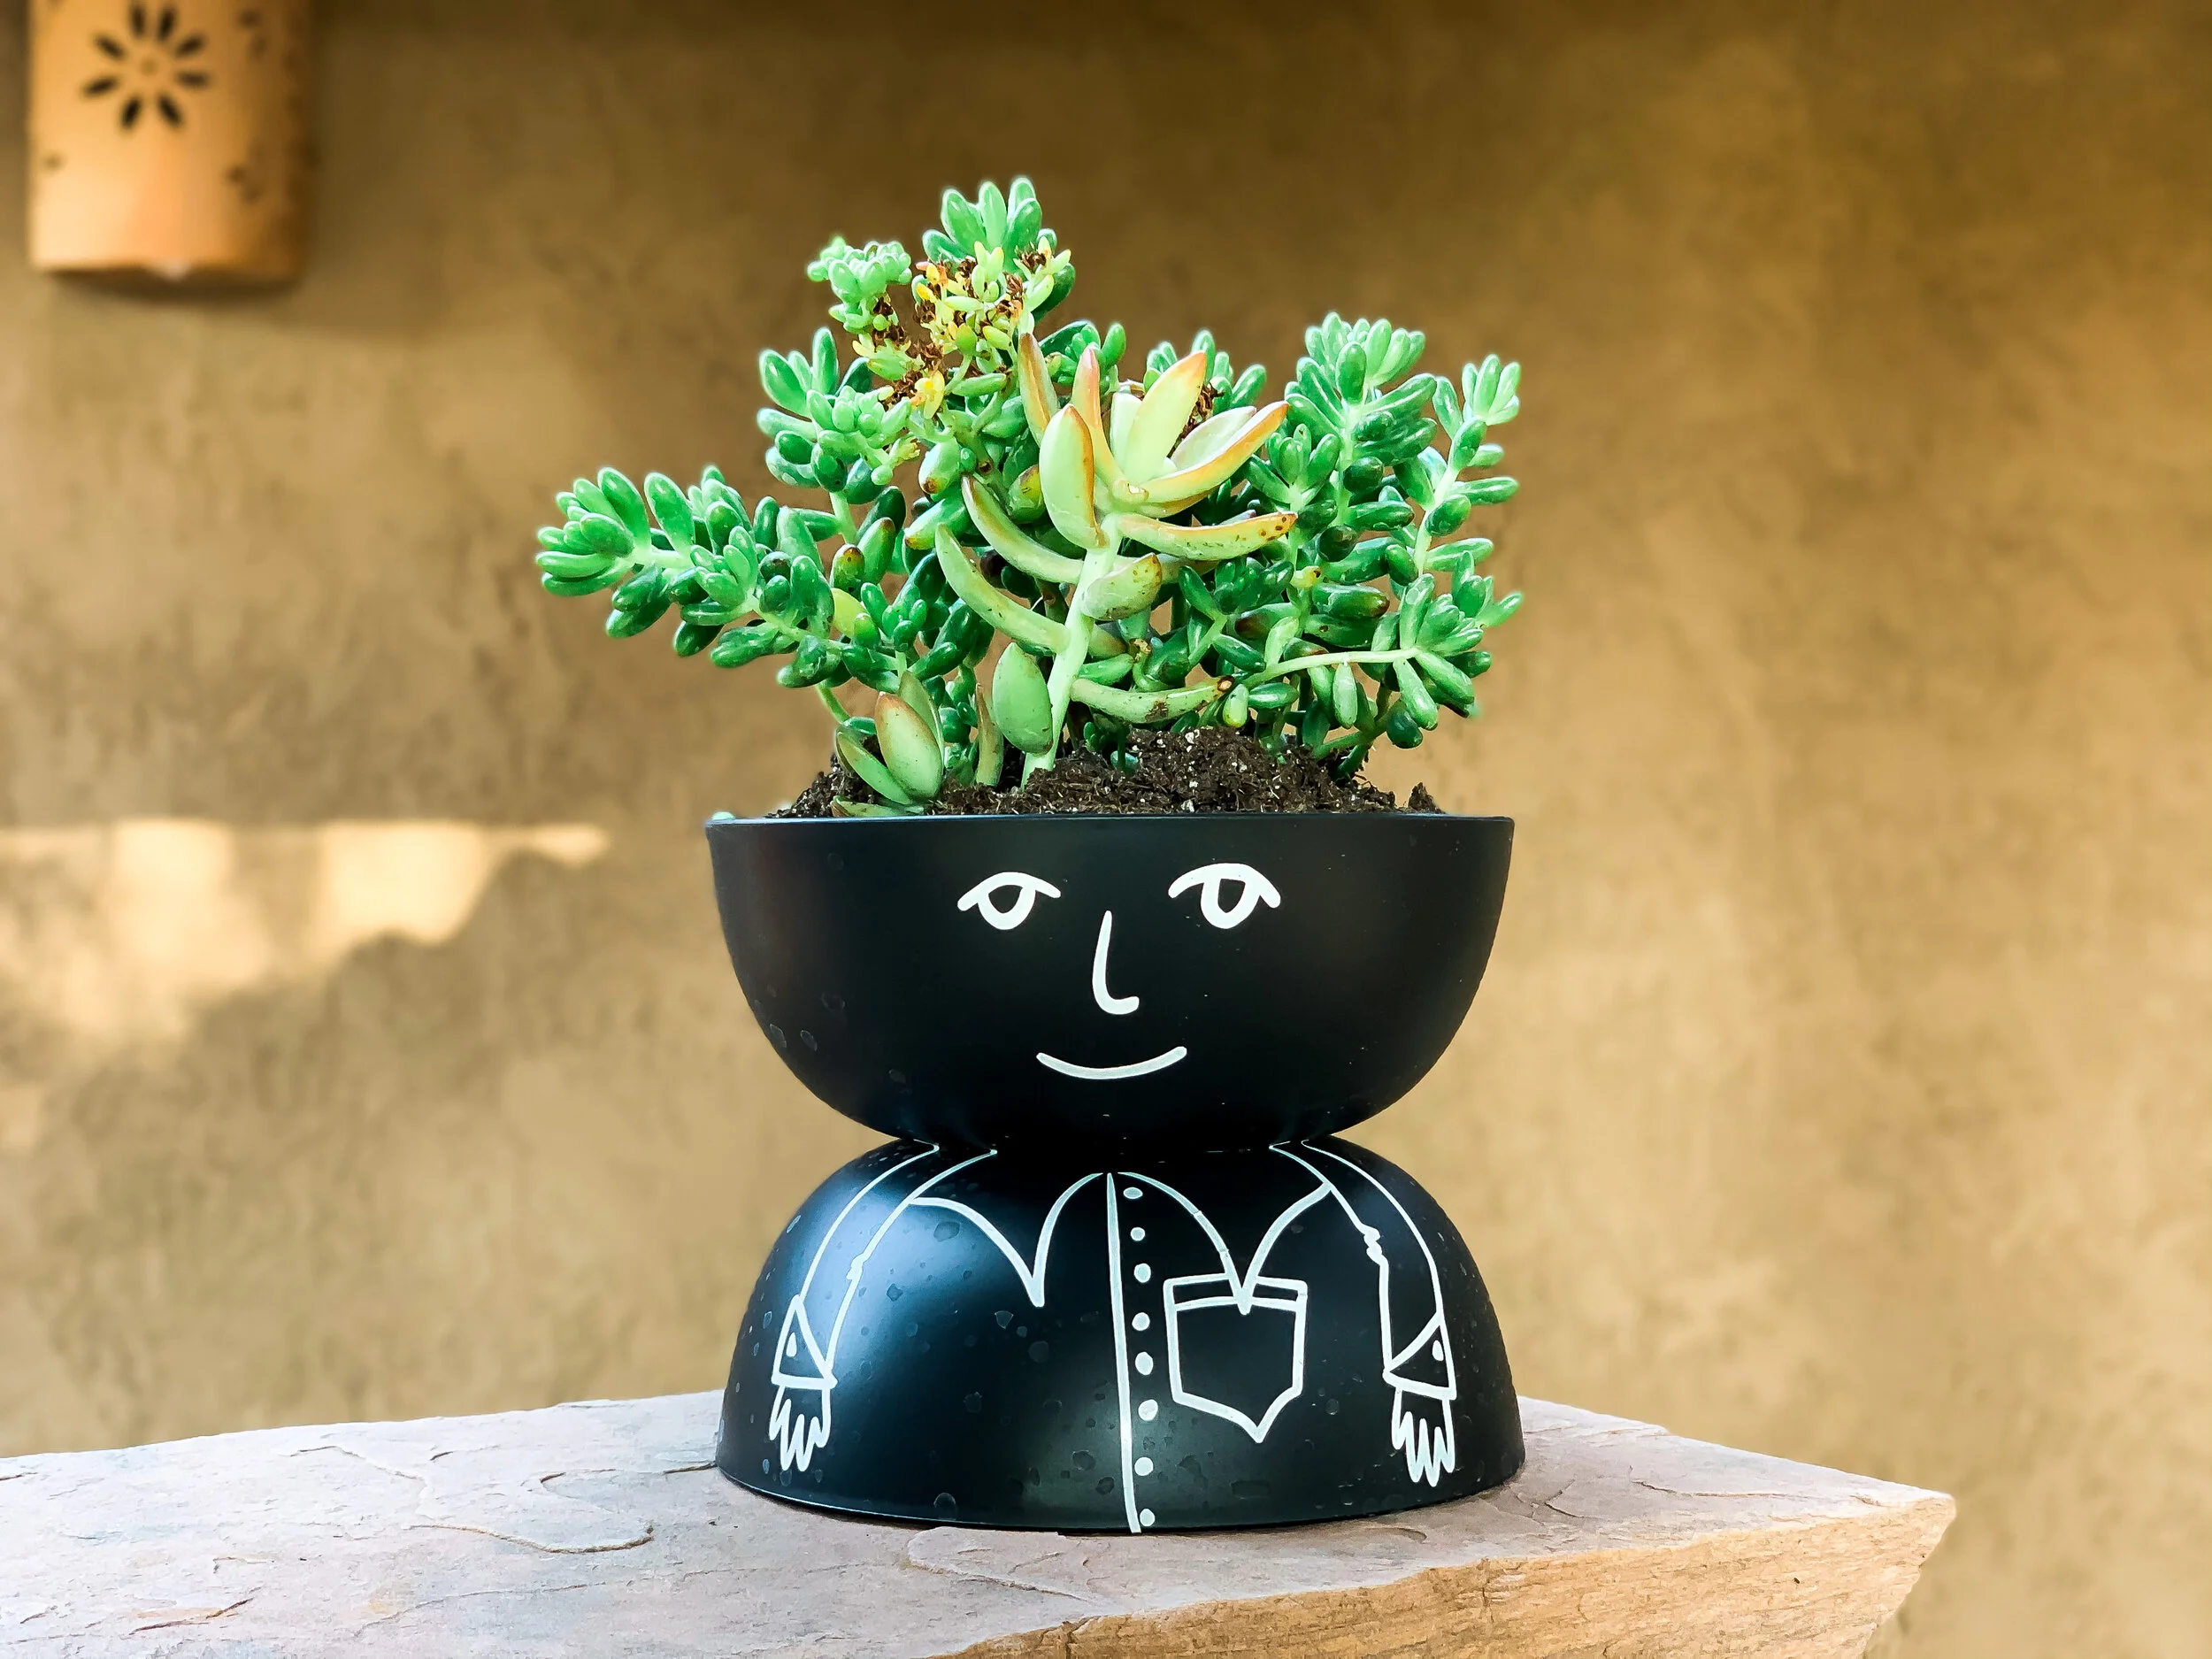
Quirky people all done and ready for some plants!
Once you’re done, it’s time for some plants. I used mostly succulents and moss rose for the ladies. It was so much fun creating their “hair” plants. You will want to add a saucer underneath these to catch the water should you use them inside.
I hope you’ve enjoyed this tutorial- and would love to see your creations- tag me @lissaanglin on any social!