Well friends, we have officially finished the renovation process of our home- I really had great intentions to share more of the in-between process, but now I think it’s best I go room-by-room so that I can show you the full transformation in each space.
That being said, as I work on getting everything styled/decorated, I have been working on some fun little side projects, like this one!

If you’ve been on the internet for half a second lately, you will have seen the HUGE pampas grass trend that’s happening right now (here you go just in case you don’t believe me)- which is super handy for those of us living in West Texas, because it grows really well here. In fact, my parents happen to have some in their backyard.
So, I asked my mom to bring me some to use on our fireplace mantel. Little did I know that they would literally be 5 feet tall and waaaayyyyy too big to put in the tiny vase on our mantel I’d planned. So I decided to just put them in a floor vase on the ground. Problem was- I had no floor vase, and barely any budget to go out and buy one.
That’s when I found myself hanging out in the air ventilation section of Lowe’s looking like a crazy person to the many contractors who came and went while I pondered. But guess what, ya’ll? I DID IT. I made a vase, and it only cost me $15.
This project was definitely more of an experiment than an actual “project”. I had seen the terracotta paint trend on Tiktok and thought this would be a fun opportunity to try it out. Warning: THIS IS A MESSY, IMPERFECT PROJECT. If you are a perfectionist, maybe just save up your dollars and buy yourself a vase. But if not, read below to see how it turned out!
Here’s a quick little video if you want a sneak peek of the process:

What you’ll need:
Galvanized Steel Round Duct Pipe found in the HVAC section at the home improvement store
I used a 6”x24” one ($7), but you could use any size- they have larger ones
Galvanized Steel Round End Cap (also in the HVAC section)
You will want to be sure you get the same width as your pipe- in this case 6” wide
This cost around $6
Plaster of Paris (found in the paint section, but I already had some at home)
Medium to coarse grit sandpaper- I used 60 grit I had at home
Vinegar
Water
Duct Tape
Wide Paintbrush
Acrylic paint (I used brown, red, black and yellow to create a terracotta color)
Polycrylic Satin Finish (not necessary but recommended)

Step 1: Build the vase
This is pretty self-explanatory: the pipe has a snap-lock design that literally just pops into place. Might want to wear some work gloves while doing this, though- those edges can be sharp!
Once the tube is made, insert the end cap. It should fit perfectly on the plain end of the tube (not the side with the waves).
Step 2: Prep for paint
I used the duct tape to cover the top end of the vase- so that it had a rounder edge and I wouldn’t be cutting myself while working with it. I used several pieces and just folded it hot dog style over the lip.
Next, you’ll want to wipe the outer surface with vinegar. Just wipe and let it set. And then sand your little heart out. The galvanized steel has a chemical layer on it that keeps it from rusting, and that needs to come off in order for the paint to adhere. The vinegar helps it break down, and the sandpaper takes it off.
Sand everything for as long as you can. The rougher the surface, the better your paint will adhere- and even sand the duct tape a little. It will be fine, I promise.
Step 3: Paint
So there are many different recipes for terracotta-style paint- but I chose to use Plaster of Paris because 1. I already had some at the house and 2. I like working with it. It’s water soluble and pretty forgiving.
To mix your paint, you’ll dump a cup or so of the plaster of paris into a bowl, add your paint (I did generous squirts of brown, a little red, and a little yellow), and then around a 1/2 c of water. Use a popsicle stick (or some other hard tool) to mix. You want your mixture to be spreadable, but hold it’s shape- I would say a thick milkshake texture. If it’s too thick, add a bit of water. If it’s too thin, add a bit of plaster.
For more of a visual on mixing the paint, check out my short video above.

1st coat finished and dry! As you can see, the plaster mixture is much darker when wet.
Also remember that because the plaster is white it will naturally make your mixture lighter. It will also dry significantly lighter than it is when wet. I did a few test colors on the protective cardboard I was working on to check color before I actually started painting the vase. To do this, just wipe a bit of the paint/plaster mixture on a surface and use a blow dryer to dry it. It should lighten considerably and give you a realistic color representation.
You will need to work relatively quickly, because your plaster will harden and create chunks in your mixture. If you’re into the texture, go with it. If you’re not— don’t say I didn’t warn you. :)
Turn the vase upside down and start painting. Your first layer will be thin and you’ll likely be able to see the metal through it in places. Be sure the bottom is completely dry before flipping it over to paint the top lip. I also painted the top 3-4 inches of the inside. The plaster is very fragile as it dries and so it will chip off if you’re not super careful when you’re moving the vase around.

Here you can see the texture of the plaster and the inside of the vase with only 1 coat.
Once you have 1 coat, cover your plaster mixture (if you don’t, it will dry and chunks will form!) until you are ready for the 2nd coat.
Repeat the process with 2 more coats. The texture should build considerably, and the pattern/seams in the metal should disappear under the plaster. If you feel the vase is getting too texture-y, don’t worry- once it’s dry, you can lightly sand it with sandpaper and it will smooth out.
I paid special attention to the tip rim of the vase once I was finishing up- making sure there was enough thickness there with the plaster.
Step 4: Paint Details (Optional)
Once the plaster was completely dry, I decided to add some detail to make it look more pottery-ish. To be honest, I’m still not sure if I like it, but I’m going to let it hang out by my fireplace for a while to see if it grows on me.
To paint the detail, I just thinned out some white acrylic paint and used a round brush. I wanted the detail to be a little transparent, and this did the trick. If your paint is too thin and it drips, it’s pretty easy to wipe off with a damp paper towel.
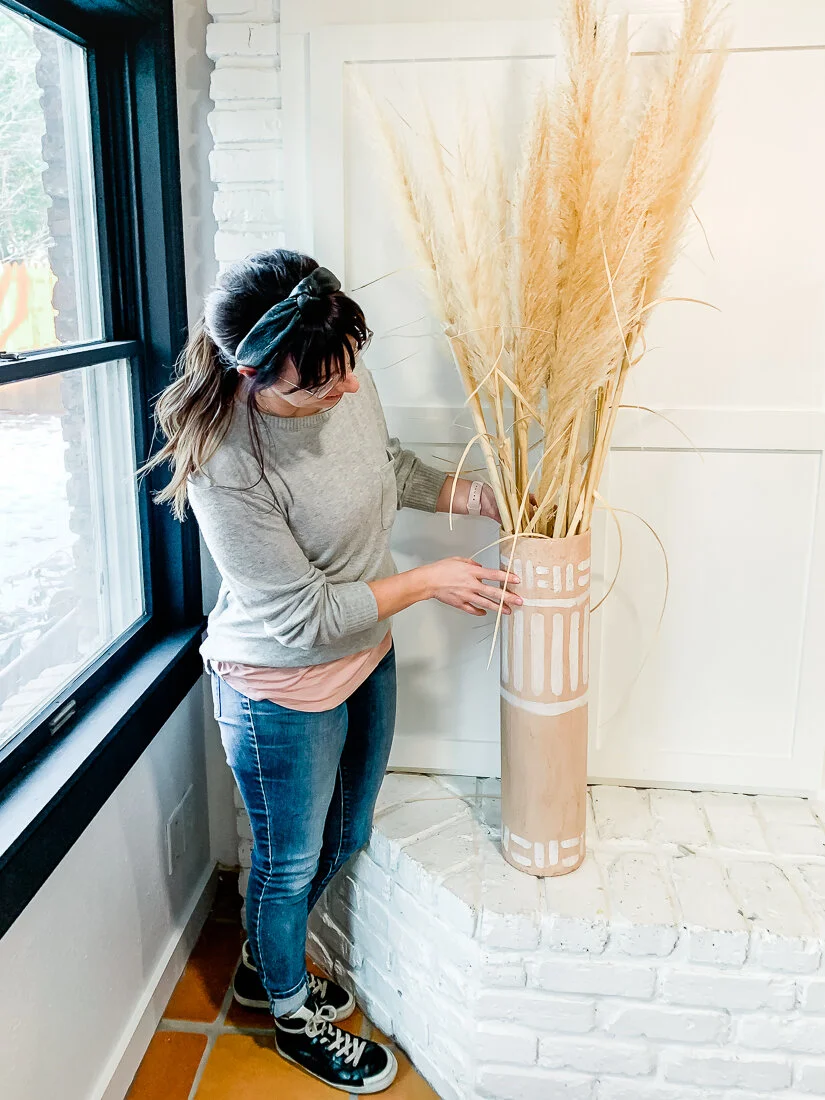
The finished product!
Step 5: Topcoat
This step could also be optional if you are super in love with the matte look and don’t want to change it in any way. However, I will say that the Polycrylic Satin is quite matte when dry and will actually make the vase more sturdy and strengthen the plaster/paint mix- so I highly suggest it.
If you give this project a shot, be sure to share your results with me by tagging me @lissaanglin on social! I’d love to see if I could find some type of cardboard tube to also try with this plaster-paint treatment.
Come say hi on Instagram!